Thumbnail
This article will get you familiar with the RadDiagramThumbnail control that is part of Telerik Diagramming Framework.
The RadDiagramThumbnail control provides a preview of the overall layout of the RadDiagram. It allows you to easily keep track of your current viewport and its position in the RadDiagram
In order to use the RadDiagramThumbnail control along with the RadDiagram in your projects you have to add references to the following assemblies:
- Telerik.Windows.Controls
- Telerik.Windows.Controls.Diagrams
- Telerik.Windows.Controls.Diagram.Extensions
- Telerik.Windows.Controls.Input
- Telerik.Windows.Controls.Navigation
- Telerik.Windows.Diagrams.Core
Define a RadDiagramThumbnail
You can define the RadDiagramThumbnail in xaml or in your code-behind. In both cases, in order to synchronize it with your diagram, you need to set its Diagram property accordingly.
<Grid x:Name="LyoutRoot">
    <Grid.RowDefinitions>
        <RowDefinition Height="*" />
        <RowDefinition Height="Auto" />
    </Grid.RowDefinitions>
    <telerik:RadDiagram x:Name="xDiagram" Width="1800">
        <telerik:RadDiagramShape x:Name="Shape1"
                                 Content="Shape1"
                                 Geometry="{telerik:FlowChartShape ShapeType=Database1Shape}"
                                 Position="100,80" />
        <telerik:RadDiagramShape x:Name="Shape2"
                                 Content="Shape2"
                                 Position="200,180" />
        <telerik:RadDiagramConnection Source="{Binding ElementName=Shape1}" Target="{Binding ElementName=Shape2}" />
    </telerik:RadDiagram>
    <telerik:RadDiagramThumbnail x:Name="xThumbnail"
                                 Grid.Row="1"
                                 Diagram="{Binding ElementName=xDiagram}" />
</Grid>
RadDiagramThumbnail xDiagramThumbnail= new RadDiagramThumbnail() { Diagram = this.xDiagram };
...
this.LayoutRoot.Children.Add(xDiagramThumbnail);
Dim xDiagramThumbnail As New RadDiagramThumbnail() With { .Diagram = Me.xDiagram }
...
Me.LayoutRoot.Children.Add(xDiagramThumbnail)
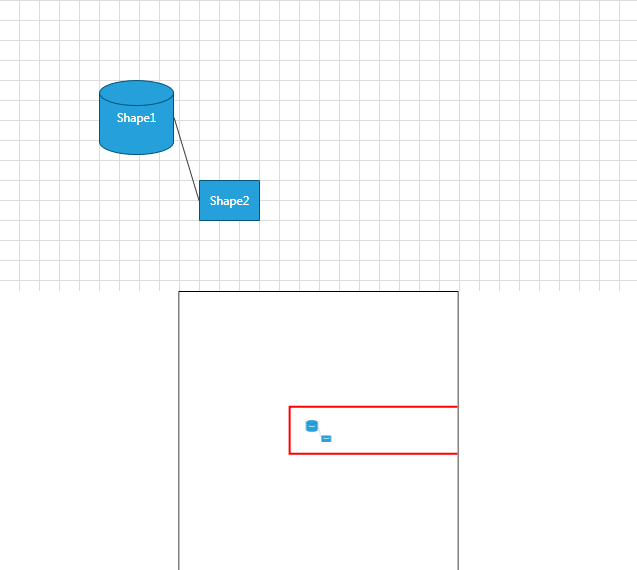
Please note that the examples in this tutorial are showcasing Telerik Windows8 theme. In the Setting a Theme article you can find more information on how to set an application-wide theme.
If you need to update the RadDiagramThumbnail viewport, you can take advantage of the RefreshThumbnail() method.
Viewport
The RadDiagramThumbnail indicates the current viewport of the RadDiagram through a Red Rectangle element. You can change the style of this rectangle by applying a custom style on it. The RadDiagramThumbnail control exposes a ViewportStyle property which you can use to change the Stroke and the StrokeThickness of the Viewport rectangle.
<telerik:RadDiagramThumbnail x:Name="xThumbnail"
                             Grid.Row="1"
                             Diagram="{Binding ElementName=xDiagram}">
    <telerik:RadDiagramThumbnail.ViewportStyle>
        <Style TargetType="Rectangle">
            <Setter Property="Stroke" Value="Blue" />
        </Style>
    </telerik:RadDiagramThumbnail.ViewportStyle>
</telerik:RadDiagramThumbnail>
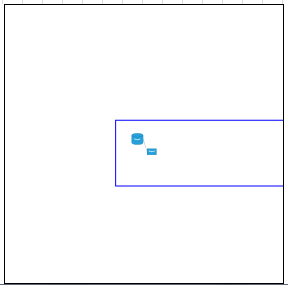
If you want to get the size and the position of the RadDiagramThumbnail's Viewport you can use the RadDiagramThumbnail.ViewportRect property. You can also get the zoom factor applied in the diagram through the RadDiagramThumbnail.Zoom property.
Styling and Templates
The RadDiagramThumbnail can be styled by creating an appropriate Style and setting it to the Style property of the control. You have two options:
To create an empty style and set it up on your own.
To copy the default style of the control and modify it.
In order to implement the second one, you have to load your project in Expression Blend and open the view that holds the RadDiagramThumbnail. In the 'Objects and Timeline' pane select the thumbnail you want to style.
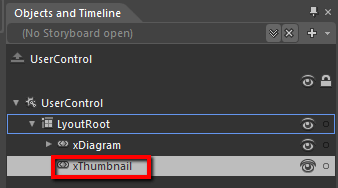
From the menu choose Object -> Edit Style -> Edit a Copy. You will be prompted for the name of the style and where to be placed.
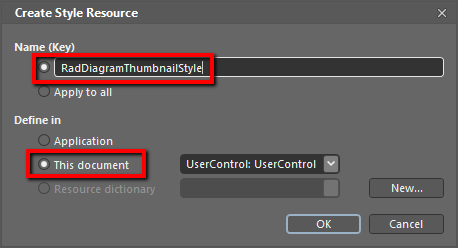
If you choose to define the style in Application, it would be available for the entire application. This allows you to define a style only once and then reuse it where needed.
After clicking 'OK', Expression Blend will generate the default style of the RadDiagramThumbnail control in the Resources section of your view. The properties available for the style will be loaded in the 'Properties' pane and you will be able to modify their default values.
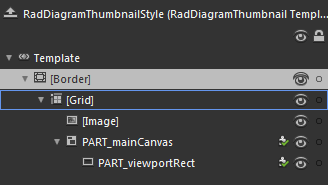
You can modify these properties to achieve the desired appearance. However most of the visual parts of the RadDiagramThumbnail have to be styled in its template. To modify it select the style in the 'Objects and Timeline' pane, right-click on it and choose Edit Template -> Edit Current. In the same pane the element parts for the RadDiagramThumbnail's template will get loaded.
