Attached Behavior/Properties
Ever found your self in a situation where a control is missing the one feature that would make it perfect for your requirements? Or maybe you want to modify its default behavior in a specific scenario? This is where attached properties come handy.
Attached properties could be used to extend the functionality of a control with very little implementation on our side. A great benefit is that an additional behavior can be added without performing the logic in the code-behind of the window where the control is situated.
Example
The following example uses the RadGridView control, however, the approach can be applied to any other dependency object.
Let's assume you would like to ask your users for confirmation when changing the selected item of the RadGridView control. Usually, in such case, you can handle the SelectionChanging event and cancel it when a specific condition is met. This can be easily done through an attached behavior. Here are the steps you need to follow.
1. Create the class that will hold the attached property:
Example 1: Create the attached property
public class SelectionChangingBehavior
{
    public static bool GetShouldShowConfirmationDialog(DependencyObject obj)
    {
        return (bool)obj.GetValue(ShouldShowConfirmationDialogProperty);
    }

    public static void SetShouldShowConfirmationDialog(DependencyObject obj, bool value)
    {
        obj.SetValue(ShouldShowConfirmationDialogProperty, value);
    }

    public static readonly DependencyProperty ShouldShowConfirmationDialogProperty =
        DependencyProperty.RegisterAttached("ShouldShowConfirmationDialog", typeof(bool), typeof(SelectionChangingBehavior), new PropertyMetadata(OnShouldShowConfirmationDialogChanged));
}
Example 2: Handle the SelectionChangingEvent of RadGridView on activating the behavior
private static void OnShouldShowConfirmationDialogChanged(DependencyObject d, DependencyPropertyChangedEventArgs e)
{
    RadGridView gridView = d as RadGridView;
    if ((bool)e.NewValue == true)
    {
        gridView.SelectionChanging += GridView_SelectionChanging;
    }
}

private static void GridView_SelectionChanging(object sender, SelectionChangingEventArgs e)
{
    MessageBoxResult result = MessageBox.Show("Do you want to change the selection?", "Selection Changing Dialog", MessageBoxButton.OKCancel);
    if (result == MessageBoxResult.Cancel)
    {
        e.Cancel = true;
    }
}
Example 3: Set the attached behavior to the specific RadGridView
    <telerik:RadGridView Grid.Row="0"
                         Name="clubsGrid"
                         ItemsSource="{Binding Clubs}"
                         my:SelectionChangingBehavior.ShouldShowConfirmationDialog="True"
                         AutoGenerateColumns="False"
                         Margin="5">
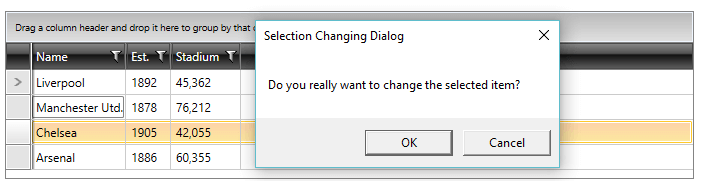
Figure 1: Confirmation dialog on changing the selected item of the RadGridView
Another implementation can be found on the following blog post - Extending the Functionalities of RadControls with Attached Properties.
There is a demo available in our SDK repository located at GitHub - ListBox SelectedItems. The example is also available in the SDK Samples Browser labeled "Create Attached Property for SelectedItems".
TextBoxBehavior
The built-in behavior of the standard TextBox control can be manipulated through as set of members exposed by the TextBoxBehavior class. It is defined in the Telerik.Windows.Controls namespace.
- SelectAllOnGotFocus: Selects the whole Text when the TextBox receives focus.
- SelectAllOnTripleClick: Selects the whole Text when the user performs a triple mouse click.
- UpdateTextOnEnter: Updates the bound property when the user presses Enter key.
- UpdateTextOnTextChanged: Updates the bound property on each user input.
Example 4: Applying the TextBoxBehavior
<TextBox Text="{Binding Name}" telerik:TextBoxBehavior.SelectAllOnGotFocus="True" />