First Steps by Installing with an MSI File
The Telerik UI for ASP.NET AJAX library provides an option for installing its controls by downloading and executing the MSI file, which contains the suite.
MSI files are intended for easy and automatic installation of a product. This tutorial describes how to get up and running with Telerik UI for ASP.NET AJAX by downloading and installing the controls from the MSI file, which will install the suite on your computer and will automatically create the necessary virtual folders and projects.
- First, you will install the Telerik UI for ASP.NET AJAX library from an MSI file and load the demos.
- Next, you'll create your ASP.NET AJAX application and add the Editor control to it.
- Then, you will dive deeper by defining the HtmlChart control and binding it to sample data.
- Finally, you will add some styling to the controls.
What about a free Telerik UI onboarding course? Learn how to take advantage of the Telerik Virtual Classroom.
Prerequisites
The following prerequisites are required for accomplishing the scenario in this tutorial. For more information on the third-party tooling versions supported by Telerik UI for ASP.NET AJAX, refer to the list with system requirements.
If a new user, create a Telerik account.
Step 1: Install Telerik UI for ASP.NET AJAX
Log into your Telerik account.
-
For trial users, navigate to Telerik UI for ASP.NET AJAX and select Download Free Trial.
For commercial users, on the DOWNLOADS tab, choose Progress® Telerik® UI for ASP.NET AJAX, and then select Latest Public Version.
Download the Commercially Licensed Version
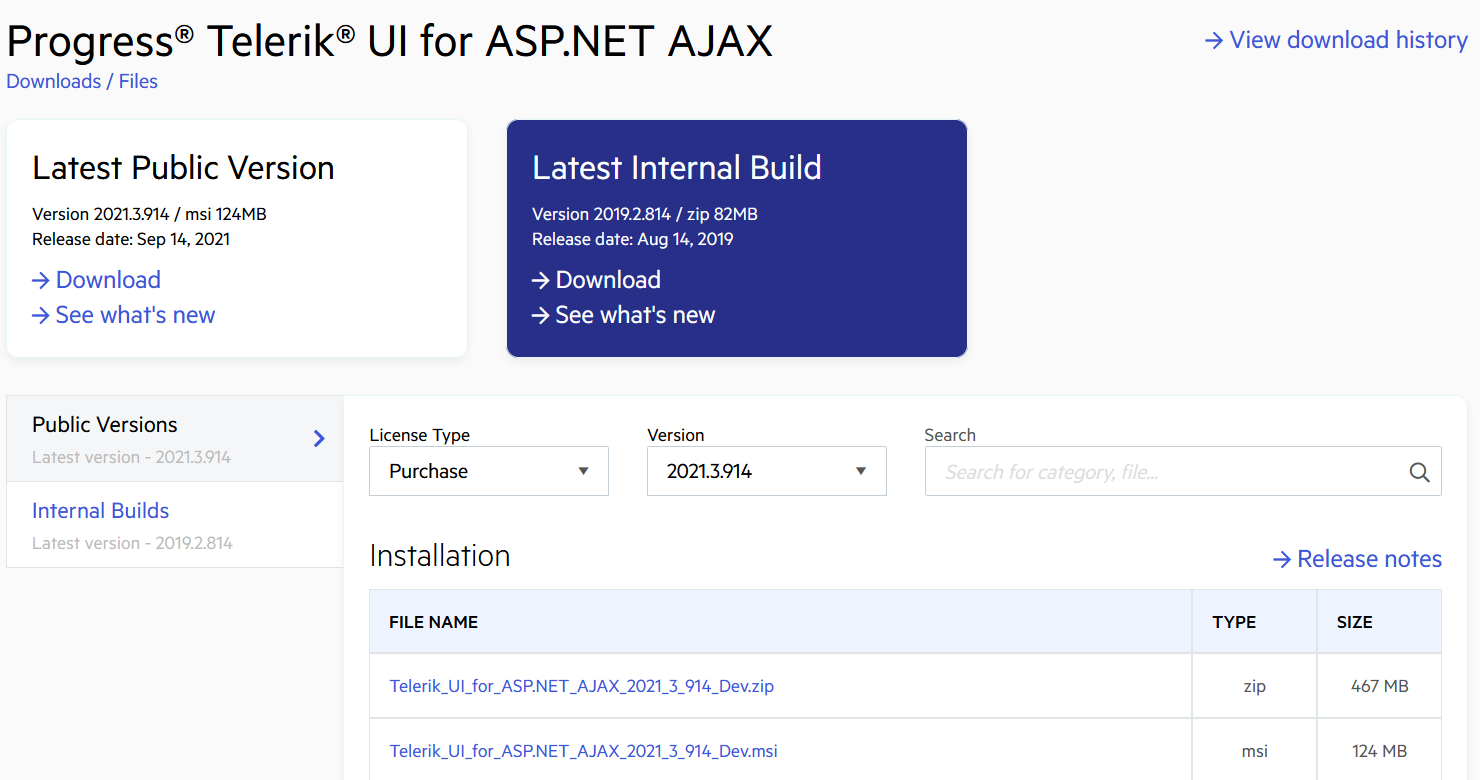
Download the Automatic installation (MSI) file.
Once the download completes, run the MSI file and follow the instructions. On a 32-bit machine and unless you specify otherwise, the wizard will install the Telerik UI for ASP.NET AJAX suite in the
C:\Program Files\Progress\folder. On a 64-bit machine, the default path isC:\Program Files (x86)\Progress\.
Tip: You can also install the msi silently as explained in Silent MSI install.
The Telerik UI for ASP.NET AJAX MSI package automatically adds the products to the Visual Studio toolbox. To add them manually, refer to the article on adding the Telerik controls to the Visual Studio toolbox.
The MSI also installs the Visual Studio Extensions for Telerik® UI for ASP.NET AJAX to help developers when creating, developing and/or upgrading webforms projects (web site and web application) with the Telerik® UI for ASP.NET AJAX.
Step 2: Download the Demos
-
From the Resources section of same page, download the MSI installation for the Telerik UI for ASP.NET AJAX examples. Once you install them on your machine, you can launch the live demos in either of the following ways:
- For Start Menu programs, open Telerik > Live Examples - UI for ASP.NET AJAX.
- For Windows Explorer, navigate to the Telerik control installation folder, typically
C:\Program Files\Progress\UI for ASP.NET AJAX RX YYYY\Live Demosand double-click theStartExamples.exefile.
Load the Live Examples solution to your Visual Studio and start the project by clicking
F5. The fastest way to load the examples is by using the Start Menu by selecting Telerik > UI for ASP.NET AJAX RX YYYY -> Open Sample Web Site in Visual Studio. Visual Studio will locally start the Live Demos by using the integrated ASP.NET Development Server.
Step 3: Create the ASP.NET AJAX Project
Telerik UI for ASP.NET AJAX integrates into Visual Studio through the Telerik Visual Studio Extensions. The Telerik templates allow you to effortlessly create a pre-configured Telerik UI project that contains all required resources which enable you to use the Telerik controls.
For adding the Telerik controls to an already existing project, refer to the article on adding the Telerik controls to your project.
Open Visual Studio and select File > New > Project.
-
In the search box, enter Telerik.
If the list doesn't contain Telerik templates, then the Telerik extensions are missing. In this case, go to Telerik UI for ASP.NET AJAX Extension, download the file from the VS marketplace, and install it.
Select the Telerik C# Web Forms Site template. Click Next.
Enter MyFirstTelerikSite in the Project name field, select .NET Framework 4.5 (or later), and then select Create.
In the Create New Project Wizard, select BLANK. Click Finish.
Create the new ASP.NET project
Step 4: Add the Editor to Your Project
The Web Forms Site created through the Telerik project templates includes all basic references and registrations required by the Telerik UI for ASP.NET AJAX controls, including a ScriptManager control, which is required by all AJAX controls. That's why you can add the Editor to the page in a simple way as demonstrated in this step.
Alternatively, you can add the Editor to your project by dragging it directly from the VS toolbox. For more information, refer to the article on adding the Telerik controls to the Visual Studio toolbox.
Open Default.aspx and declare RadEditor right after RadScriptManager:
<telerik:RadScriptManager ID="RadScriptManager1" runat="server"></telerik:RadScriptManager>
<telerik:RadEditor runat="server" ID="RadEditor1"></telerik:RadEditor>
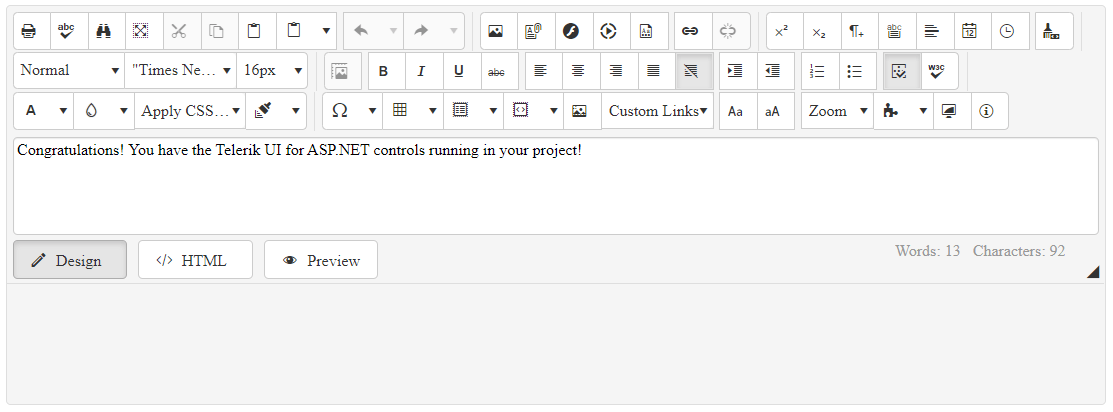
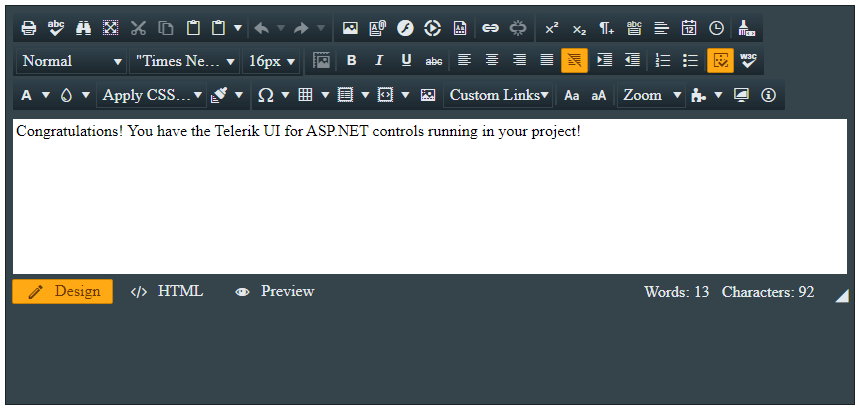
Set the RenderMode and Content properties of the Editor:
<telerik:RadScriptManager ID="RadScriptManager1" runat="server"></telerik:RadScriptManager>

<telerik:RadEditor runat="server" ID="RadEditor1" RenderMode="Lightweight">
    <Content>
        Congratulations! You have the Telerik UI for ASP.NET controls running in your project!
    </Content>
</telerik:RadEditor>
Run your page by pressing F5.
Add the Editor to the page
Step 5: Add the HtmlChart to Your Project
Let’s dive a little bit deeper in the configuration of the controls from the UI for ASP.NET AJAX suite. By following the steps below, you will create a data-bound HtmlChart. You will also add a handy tooltip that shows the values from a custom data field.
The sample uses a DataTable, but you can bind the HtmlChart to a preferred data source type. The page already contains a ScriptManager control, so you are ready to declare the HtmlChart right after the Editor control that you added in the previous step:
In Default.aspx, define an HtmlChart with ID="RadHtmlChart1":
<telerik:RadHtmlChart ID="RadHtmlChart1" runat="server">
</telerik:RadHtmlChart>
Add a ChartTitle to the created HtmlChart:
<telerik:RadHtmlChart ID="RadHtmlChart1" runat="server">
    <ChartTitle Text="Sales Log"></ChartTitle>
</telerik:RadHtmlChart>
Add ColumnSeries to the PlotArea.Series collection of the control:
<telerik:RadHtmlChart ID="RadHtmlChart1" runat="server">
    <ChartTitle Text="Sales Log"></ChartTitle>
    <PlotArea>
        <Series>
            <telerik:ColumnSeries Name="Clothes"></telerik:ColumnSeries>
        </Series>
    </PlotArea>
</telerik:RadHtmlChart>
In the code-behind of the page, create a GetData() method. This method returns the sample data that you will bind to the chart:
private DataTable GetData()
    {
        DataTable dt = new DataTable();

        dt.Columns.Add("labels");
        dt.Columns.Add("values");
        dt.Columns.Add("colors");
        dt.Columns.Add("description");

        dt.Rows.Add("Week 1", 3, "#99C794", " 1 blouse and 2 trousers");
        dt.Rows.Add("Week 2", 10, "#5FB3B3", "7 blouses and 3 skirts");
        dt.Rows.Add("Week 3", 7, "#FAC863", "7 skirts");
        dt.Rows.Add("Week 4", 12, "#6699CC", "5 blouses, 5 trousers and 2 skirts");

        return dt;
    }
Private Function GetData() As DataTable
    Dim dt As DataTable = New DataTable()

    dt.Columns.Add("labels")
    dt.Columns.Add("values")
    dt.Columns.Add("colors")
    dt.Columns.Add("description")

    dt.Rows.Add("Week 1", 3, "#99C794", " 1 blouse and 2 trousers")
    dt.Rows.Add("Week 2", 10, "#5FB3B3", "7 blouses and 3 skirts")
    dt.Rows.Add("Week 3", 7, "#FAC863", "7 skirts")
    dt.Rows.Add("Week 4", 12, "#6699CC", "5 blouses, 5 trousers and 2 skirts")

    Return dt
End Function
Configure the data source of the chart to use the created sample data:
protected void Page_Load(object sender, EventArgs e)
{
    if (!IsPostBack)
    {
        RadHtmlChart1.DataSource = GetData();
    }
}
Protected Sub Page_Load(ByVal sender As Object, ByVal e As EventArgs) Handles Me.Load
    If Not IsPostBack Then
        RadHtmlChart1.DataSource = GetData()
    End If
End Sub
Set the colors and values field names to the Series DataFieldY and ColorField properties:
<telerik:RadHtmlChart ID="RadHtmlChart1" runat="server">
    <ChartTitle Text="Sales Log"></ChartTitle>
    <PlotArea>
        <Series>
            <telerik:ColumnSeries Name="Clothes" DataFieldY="values" ColorField="colors"></telerik:ColumnSeries>
        </Series>
    </PlotArea>
</telerik:RadHtmlChart>
Set the labels field name to the PlotArea.XAxis.DataLabelsField value:
<telerik:RadHtmlChart ID="RadHtmlChart1" runat="server">
    <ChartTitle Text="Sales Log"></ChartTitle>
    <PlotArea>
        <Series>
            <telerik:ColumnSeries Name="Clothes" DataFieldY="values" ColorField="colors"></telerik:ColumnSeries>
        </Series>
        <XAxis DataLabelsField="labels"></XAxis>
    </PlotArea>
</telerik:RadHtmlChart>
Define a TooltipsAppearance nested tag in the series declaration. Then define a custom Tooltip template in it. All fields from the passed data source are available through the dataItem object of the template:
<telerik:RadHtmlChart ID="RadHtmlChart1" runat="server">
    <ChartTitle Text="Sales Log"></ChartTitle>
    <PlotArea>
        <Series>
            <telerik:ColumnSeries Name="Clothes" DataFieldY="values" ColorField="colors">
                <TooltipsAppearance>
                    <ClientTemplate>
                        There are #=dataItem.description# sold in #=category#
                    </ClientTemplate>
                </TooltipsAppearance>
            </telerik:ColumnSeries>
        </Series>
        <XAxis DataLabelsField="labels"></XAxis>
    </PlotArea>
</telerik:RadHtmlChart>
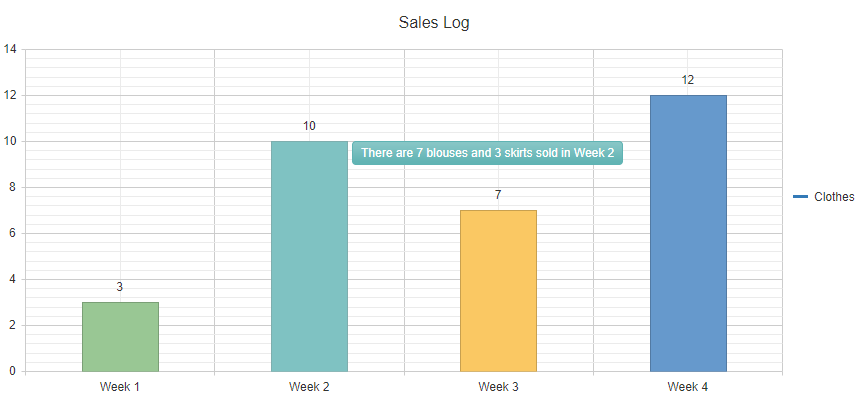
Run the page by pressing F5. You are expected to see something similar to the following image:
Bound HtmlChart with a custom Tooltip template
Step 6: Style the Controls
Telerik UI for ASP.NET AJAX provides more than 20 predefined skins that allow you to change the look and feel of each component. To use the desired skin, set the skin name as the Skin property value of the control:
<telerik:RadEditor runat="server" ID="RadEditor2" Skin="Glow" RenderMode="Lightweight">
    <Content>
        Congratulations! You have the Telerik UI for ASP.NET controls running in your project!
    </Content>
</telerik:RadEditor>
Apply the Glow skin to the Editor
That was it! Now you are ready to dive more deeply into Telerik UI for ASP.NET AJAX and take full advantage of its slick functionalities!