Scrolling Overview
Often, when constructing a Web page that contains a treelist, there are design limitations regarding the size of the treelist. In such cases, you may need to enable client-side treelist scrolling so that the treelist can fit it in the allowed space. You can enable scrolling by setting the ClientSettings.Scrolling.AllowScroll property to True (By default its value is False.)
When scrolling is enabled, the treelist columns should declare HeaderStyle.Width.
Using static headers
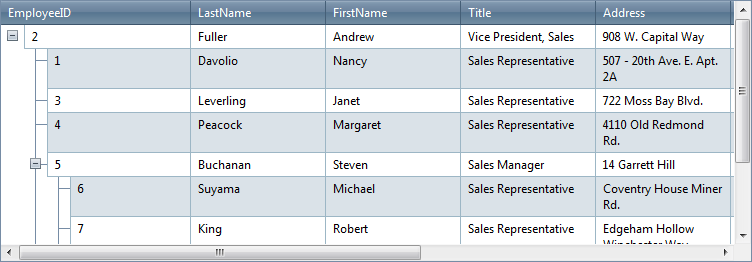
The most common problem while scrolling is losing the context of the current column. This context is supplied by the column header. RadTreeList lets you keep the header at the top even when scrolling the treelist. To enable this feature, set the ClientSettings.Scrolling.UseStaticHeaders property to True. (Its default value is False.)
When UseStaticHeaders is True, the header row is still visible,even when the treelist is scrolled: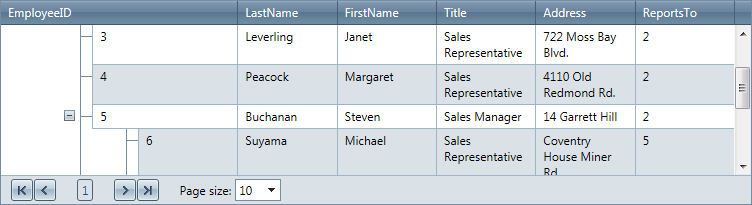
When UseStaticHeaders is False, the header scrolls along with the data rows:
Setting height to the scrollable RadTreeList
ClientSettings.Scrolling.ScrollHeight property determines the height of the control's scrollable area when scrolling is enabled. Depending on whether static headers are enabled or not, the scrollable area includes different portions of the RadTreeList control:
If static headers are enabled, the scrollable container includes only the data and footer items. The header and pager are "static" (not scrolled).
If static headers are not enabled, the scrollable container includes everything.
Saving scroll position
ClientSettings.Scrolling.SaveScrollPosition property gets or sets a value indicating whether RadTreeList will keep the scroll position during postbacks.
You can set the scrolling properties as below:
<telerik:RadTreeList RenderMode="Lightweight" ID="RadTreeList1" runat="server">
    <ClientSettings>
        <Scrolling AllowScroll="true" UseStaticHeaders="true" SaveScrollPosition="true" ScrollHeight="350px" />
    </ClientSettings>
</telerik:RadTreeList>