Skins
RadEditor uses skins to control its overall look-and-feel. A skin is a set of images and a CSS stylesheet that can be applied to the control elements (items, images, etc.) and defines their look and feel. The RadEditor skin affects the appearance of dialogs as well.
To apply a skin to a RadEditor control, set its Skin property, either using the properties pane or the Smart Tag.
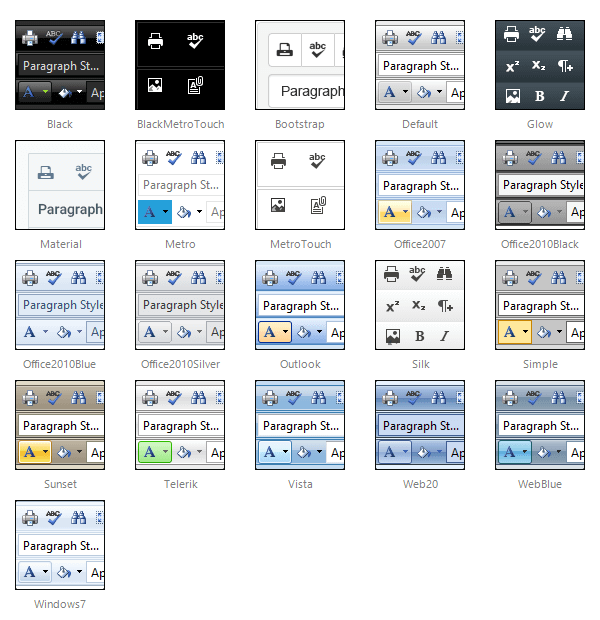
RadEditor is installed with a number of preset skins. These are shown below:
The Material skin is available for the Lightweight RenderMode only. If you experience visual issues with it, make sure your controls are not using the default Classic mode.
Customizing Skins
You can tweak the existing skins or create your own. Each skin has two main elements: images and a stylesheet. When creating your own, it is a good idea to start with the stylesheet for an existing skin and alter that. See Creating a Custom Skin For RadEditor for a step-by-step walk through. To use your own skin
- Add the new CSS file to your project.
- Drag and drop the CSS file from the Project Explorer onto your Web page.
- Set the EnableEmbeddedSkins property of the control to False.
The stylesheet for a RadEditor skin has the name Editor.[SkinName].css and can be found in the ...Skins/[SkinName] directory. The images are found in the ...Skins/[SkinName]/Editor directory. For example, the stylesheet for the "Black" skin is called Editor.Black.css and is located in the ...Skins/Black directory. The images are found in the ...Skins/Black/Editor directory. The images are referenced by name from within the stylesheet.