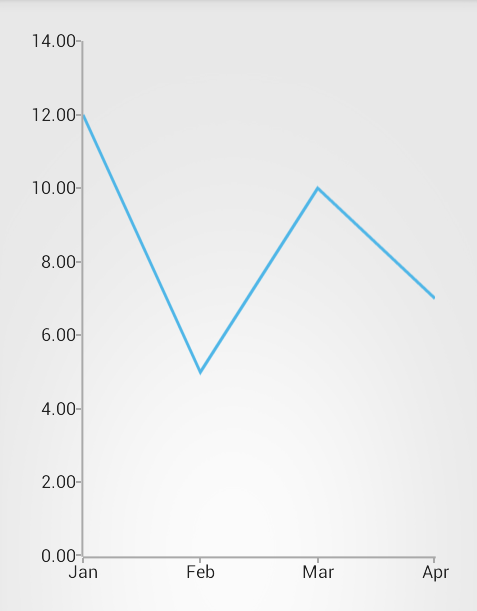
In this article, you will learn to get started with RadChartView for Android: how to initialize the chart, how to create the data series, how to use the different axes and how to create a chart that looks like this:

The easiest way to add an instance of RadChartView is to find the root view by id and add the chart as a child view, for example in the method onCreate() of your Activity. Here's how to add a Cartesian chart, to the root view (with id container):
    RadCartesianChartView chartView = new RadCartesianChartView(this);

    ViewGroup rootView = (ViewGroup)findViewById(R.id.container);
    rootView.addView(chartView);
    RadCartesianChartView chartView = new RadCartesianChartView(this);

    ViewGroup rootView = (ViewGroup)FindViewById(Resource.Id.container);
    rootView.AddView(chartView);
At this point that chart will be added to the view, but it will simply indicate that there is no data and no axes defined.
Let's create a method that will initialize some data items:
    private List<MonthResult> monthResults;

    private void initData() {
        monthResults = new ArrayList<MonthResult>();
        monthResults.add(new MonthResult("Jan", 12));
        monthResults.add(new MonthResult("Feb", 5));
        monthResults.add(new MonthResult("Mar", 10));
        monthResults.add(new MonthResult("Apr", 7));
    }
    private Java.Util.ArrayList monthResults;

    private void InitData() {
        monthResults = new Java.Util.ArrayList();
        monthResults.Add(new MonthResult("Jan", 12));
        monthResults.Add(new MonthResult("Feb", 5));
        monthResults.Add(new MonthResult("Mar", 10));
        monthResults.Add(new MonthResult("Apr", 7));
    }
Here, MonthResult is a custom type that we have defined as follows. Additionally, in C#, you will need a class that inherits from DataPointBinding that will be used for the proper data retrieval:
    public class MonthResult {
        private String month;
        private double result;

        public MonthResult(String month, double result) {
            this.setMonth(month);
            this.setResult(result);
        }

        public double getResult() {
            return this.result;
        }

        public void setResult(double value) {
            this.result = value;
        }

        public String getMonth() {
            return this.month;
        }

        public void setMonth(String value) {
            this.month = value;
        }
    }
    public class MonthResult : Java.Lang.Object {

        public String Month { get; set; }
        public double Result { get; set; }

        public MonthResult(String month, double result) {
            this.Month = month;
            this.Result = result;
        }
    }

    class MonthResultDataBinding : DataPointBinding {

        private string propertyName;

        public MonthResultDataBinding(string propertyName)
        {
            this.propertyName = propertyName;
        }

        public override Java.Lang.Object GetValue (Java.Lang.Object p0)
        {
            if(propertyName == "Month")
            {
                return ((MonthResult)(p0)).Month;
            }
            return ((MonthResult)(p0)).Result;
        }
    }
Now that we have the data, we need to add it to a series instance.
For this example we will create a chart with LineSeries. After we create the series, we need to define data point bindings for both value and category, which will determine how this information will be extracted from each of the data items.
    initData();

    LineSeries lineSeries = new LineSeries();
    lineSeries.setCategoryBinding(new PropertyNameDataPointBinding("Month"));
    lineSeries.setValueBinding(new PropertyNameDataPointBinding("Result"));
    lineSeries.setData(this.monthResults);
    chartView.getSeries().add(lineSeries);
    InitData();

    LineSeries lineSeries = new LineSeries();
    lineSeries.CategoryBinding = new MonthResultDataBinding ("Month");
    lineSeries.ValueBinding = new MonthResultDataBinding ("Result");
    lineSeries.Data = (Java.Lang.IIterable)this.monthResults;
    chartView.Series.Add(lineSeries);

    CategoricalAxis horizontalAxis = new CategoricalAxis();
    chartView.HorizontalAxis = horizontalAxis;

    LinearAxis verticalAxis = new LinearAxis();
    chartView.VerticalAxis = verticalAxis;
All that's left is to define what will be type of the axes. For the LineSeries, we will need one axis that can visualize category and one that can visualize value.
In this example, we will use one CategoricalAxis and one LinearAxis.
    CategoricalAxis horizontalAxis = new CategoricalAxis();
    chartView.setHorizontalAxis(horizontalAxis);

    LinearAxis verticalAxis = new LinearAxis();
    chartView.setVerticalAxis(verticalAxis);
    CategoricalAxis horizontalAxis = new CategoricalAxis();
    chartView.HorizontalAxis = horizontalAxis;

    LinearAxis verticalAxis = new LinearAxis();
    chartView.VerticalAxis = verticalAxis;
And that's all now when you run the application, you will see an instance of RadCartesianChart with one CategoricalAxis and one LinearAxis that visualizes LineSeries and looks like the image from the beginning of the article.