DragDropPayloadManager
The DragDropPayloadManager lets you easily generate valid drag payload objects that can be used in various drag-and-drop scenarios.
This article will cover the main features of the DragDropPayloadManager as well as their usage within a sample drag-and-drop example between two RadListBoxes.
Using the DragDropPayloadManager
Along with the option to easily create a valid drag payload, the DragDropPayloadManager allows you to attach a DataConverter to it. This DataConverter will be carried within the different methods and used in order to convert the DataObjects from one to another type. This section will demonstrate the exact approach for creating a payload, attaching a DataConverter and using it.
Let's start by creating a simple drag drop application with two RadListBoxes with ItemsSources of different types. You have the following ViewModel with one collection that contains custom objects of type Customer and another with an empty collection of strings:
public class ViewModel : ViewModelBase
{
    public ObservableCollection<Customer> ItemsSource1 { get; set; }
    public ObservableCollection<string> ItemsSource2 { get; set; }

    public ViewModel()
    {
        this.ItemsSource1 = new ObservableCollection<Customer>
        {
            new Customer { FirstName= "John", LastName = "Smith", Age = 24},
            new Customer { FirstName= "George", LastName = "Lucas", Age = 35},
            new Customer { FirstName= "Justin", LastName = "Marks", Age = 16},
            new Customer { FirstName= "Emily", LastName = "Rose", Age = 40},
            new Customer { FirstName= "Mike", LastName = "Jones", Age = 20},
        };

        this.ItemsSource2 = new ObservableCollection<string>();
    }
}
The RadListBoxes are defined in XAML the following way:
<Grid>
    <Grid.DataContext>
        <local:ViewModel />
    </Grid.DataContext>
    <Grid.Resources>
        <Style TargetType="telerik:RadListBoxItem">
            <Setter Property="telerik:DragDropManager.AllowCapturedDrag" Value="True" />
        </Style>
    </Grid.Resources>
    <Grid.ColumnDefinitions>
        <ColumnDefinition Width="200" />
        <ColumnDefinition Width="200" />
    </Grid.ColumnDefinitions>
    <telerik:RadListBox x:Name="ListBox1" Grid.Column="0" Margin="10"
                ItemsSource="{Binding ItemsSource1}"
                DisplayMemberPath="FirstName"
                AllowDrop="True" />
    <telerik:RadListBox x:Name="ListBox2" Grid.Column="1" Margin="10"
                ItemsSource="{Binding ItemsSource2}"
                AllowDrop="True" />
</Grid>
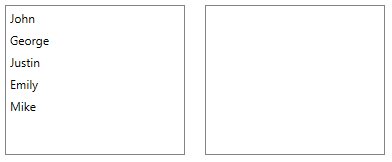
You can see the application in Figure 1:
Figure 1: ListBox1 is on the left and ListBox2 is on the right.
Next you will need to enable the drag and drop by adding a DragInitializeHandler for the first RadListBox, so you can drag from the first RadListBox and drop afterwards on the second one.
DragDropManager.AddDragInitializeHandler(this.ListBox1, OnDragInitialize);
In the handler method where the payload is generated you will need to attach a DataConverter that will be used to convert the dragged item from object of type Customer to a simple string. That is why before implementing the handler you will need to create the following DataConverter:
public class CustomerToStringConverter : DataConverter
{
    public override object ConvertTo(object data, string format)
    {
        if (format == typeof(string).FullName && DataObjectHelper.GetDataPresent(data, "DragData", false))
        {
            var customer = DataObjectHelper.GetData(data, "DragData", false) as Customer;
            var fullInfoString = "Name: " + customer.FirstName + " " + customer.LastName + ", Age: " + customer.Age;
            return fullInfoString;
        }

        return null;
    }

    public override string[] GetConvertToFormats()
    {
        return new string[] { typeof(string).FullName };
    }
}
The DataConverter can convert objects from multiple types to multiple types inside its ConvertTo() method. You will need to check if the format is the desired one as well as if the needed data is present. The GetConvertToFormats() method should return a collection of the supported formats to convert to, so the control can accept or prevent the drop when the dragged object cannot be converted to the required format.
In the DragInitialize handler itself you will need to pass to the DragDropPayloadManager an instance of the converter that will be carried by the payload within the events and used when needed:
private void OnDragInitialize(object sender, DragInitializeEventArgs e)
{
    e.AllowedEffects = DragDropEffects.All;
    var payload = DragDropPayloadManager.GeneratePayload(new CustomerToStringConverter());
    var data = ((FrameworkElement)e.OriginalSource).DataContext;
    payload.SetData("DragData", data);
    e.Data = payload;
    e.Handled = true;
}
Now you can add the DropHandler for the second RadListBox inside of which the dragged data will be converted using the converter.
DragDropManager.AddDropHandler(this.ListBox2, OnDrop);
Inside of the handler you can also add another DataObject to the payload that indicates whether the drop was successful or not. Let's add an object named IsDropSuccessful and set its value to true. This way you will know afterwards in the DragDropCompletedHandler of the first RadListBox if the drop on the second one was successful (or data has been dropped elsewhere):
private void OnDrop(object sender, Telerik.Windows.DragDrop.DragEventArgs e)
{
    var data = DragDropPayloadManager.GetDataFromObject(e.Data, typeof(string).FullName);
    ((IList)(sender as RadListBox).ItemsSource).Add(data);
    DragDropPayloadManager.SetData(e.Data, "IsDropSuccessful", true);
    e.Handled = true;
}
After that, you should handle the DragDropCompleted of the first list box and check if the drop was successful:
DragDropManager.AddDragDropCompletedHandler(this.ListBox2, OnDragDropCompleted);
private void OnDragDropCompleted(object sender, DragDropCompletedEventArgs e)
{
    var isDropSuccessful = DragDropPayloadManager.GetDataFromObject(e.Data, "IsDropSuccessful");

    if (isDropSuccessful != null && (bool)isDropSuccessful)
    {
        var data = DragDropPayloadManager.GetDataFromObject(e.Data, "DragData");
        ((IList)(sender as RadListBox).ItemsSource).Remove(data);
    }

    e.Handled = true;
}
In addition to this, you can use the DragDropPayloadManager in order to check whether the dragged data can be converted to a type that is required from the ItemsSource. This is done by using the GetFormats method, which returns a collection of the supported types. If the required type is not present, you can easily prevent the drop by setting the Effects property of the drag arguments to DragDropEffects.None:
DragDropManager.AddDragOverHandler(this.ListBox2, OnDragOver);
private void OnDragOver(object sender, Telerik.Windows.DragDrop.DragEventArgs e)
{
    var formats = DragDropPayloadManager.GetFormats(e.Data, true);

    if (formats.Contains(typeof(string).FullName))
    {
        e.Effects = DragDropEffects.Move;
    }
    else
    {
        e.Effects = DragDropEffects.None;
    }

    e.Handled = true;
}
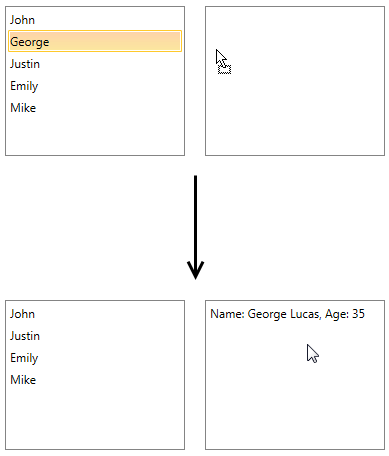
Figure 2 shows the final result. When the dragged item is dropped, it will be converted to a string, added to the ItemsSource of the second RadListBox and removed from the ItemsSource of the first list box.
Figure 2: ListBox1 is on the left and ListBox2 is on the right. After the drop is completed the object is converted to string.
Find a runnable project of the previous example in the WPF Samples GitHub repository.