Inserting Data
In this task, you will extend the code to enable you to create new Car objects.
- Open the Default.aspx page in Source view.
-
Navigate to OpenAccessLinqDataSourceCar and set the EnableInsert property to True. This will enable the OpenAccessLinqDataSource control to automatically handle insert operations. You could find more information, here.
<telerik:OpenAccessLinqDataSource
    ID="OpenAccessLinqDataSourceCar"
    runat="server" EnableInsert="True"
    ContextTypeName="SofiaCarRental.Model.FluentModel"
    ResourceSetName="Cars">
</telerik:OpenAccessLinqDataSource>
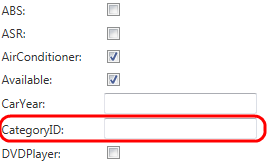
Run your application and try to insert a new Car object. Note that when you try to create a new car record, you should enter a CategoryID. In the SofiaCarRental database, there is an one-to-many relation between the Cars and Categories tables. The CategoryID property should match an existing Category.

In other words, the Car entity has a reference to the Category entity. The next step is to modify the RadGrid control to use a GridDropDownColumn to display all categories:
- Open the Default.aspx page in Source view.
-
Locate the definition for the CategoryID column in the RadGrid.MasterTableView.
<telerik:GridBoundColumn DataField="CategoryID" DataType="System.Int32" FilterControlAltText="Filter CategoryID column" HeaderText="CategoryID" SortExpression="CategoryID" UniqueName="CategoryID"> </telerik:GridBoundColumn> -
And replace with this. This is the moment when you are going to use the second OpenAccessLinqDataSource control.
<telerik:GridDropDownColumn UniqueName="DropDownCategoryListColumn" ListTextField="CategoryName"
   ListValueField="CategoryID" DataSourceID="OpenAccessLinqDataSourceCategory" HeaderText="Category"
   DataField="CategoryID" DropDownControlType="RadComboBox" AllowSorting="true"
   ItemStyle-Width="120px" />
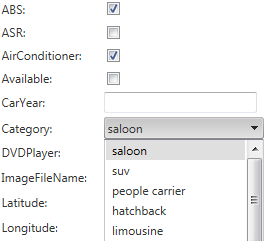
Run your application again, and try to add a new car record. This time, all categories will be shown in the drop-down.

