Creating New Projects
This article demonstrates how to use the Telerik Visual Studio extensions to create a new project that is pre-configured for the Progress® Telerik® UI for Blazor components.
To create a new Telerik UI for Blazor application, use the Create New Project wizard. The wizard detects all installed versions of Telerik UI for Blazor and lists them in the Version combobox—this feature enables you to start your project with the desired version. To make sure the components are up to date, you can also get the latest version.
The Create New Project Wizard automates a set of steps that you otherwise must perform manually.
The wizard adds the following client assets to your project:
The wizard also configures the project to use the Telerik UI for Blazor components by adding the following utilities:
-
Required
@usingdirectives to the~/_Imports.razorfile. -
TelerikLayout.razorcomponent at the root level of the DOM. - Registration for the Telerik services for client-side projects, for server-side projects, and for hybrid projects.
Getting the Wizard
To use the Create New Telerik Project wizard, install the Telerik UI for Blazor Visual Studio Extension. You can get the extension from:
- The Visual Studio Marketplace (for Visual Studio 2022 for Windows and Visual Studio 2019 for Windows).
- The Telerik UI for Blazor automated installer (for Windows and Mac).
- Your Telerik.com account (for Mac only). Download the
.mpackfile and use the "Install from file..." button on the Visual Studio Extensions dialog.
Our extention for Visual Studio for Mac will be discontinued in 2024 after Visual Studio for Mac is discontinued.
Starting the Wizard
To start the wizard, use either of the following options:
Extensions Menu
- Open the Extensions menu.
- Click Telerik > Telerik UI for Blazor > Create New Project.
- Follow the instructions.
Project Menu
- Click File > New > Project.
- Find and click the Telerik C# Blazor Application option (you can use the search, or filter by Blazor templates).
- Follow the instructions.

Using the Wizard
In the order of their appearance, the Create New Project wizard presents the following screens with options that will assist you to configure your new app:
On the first screen, you can select a location and a name for your project.
-
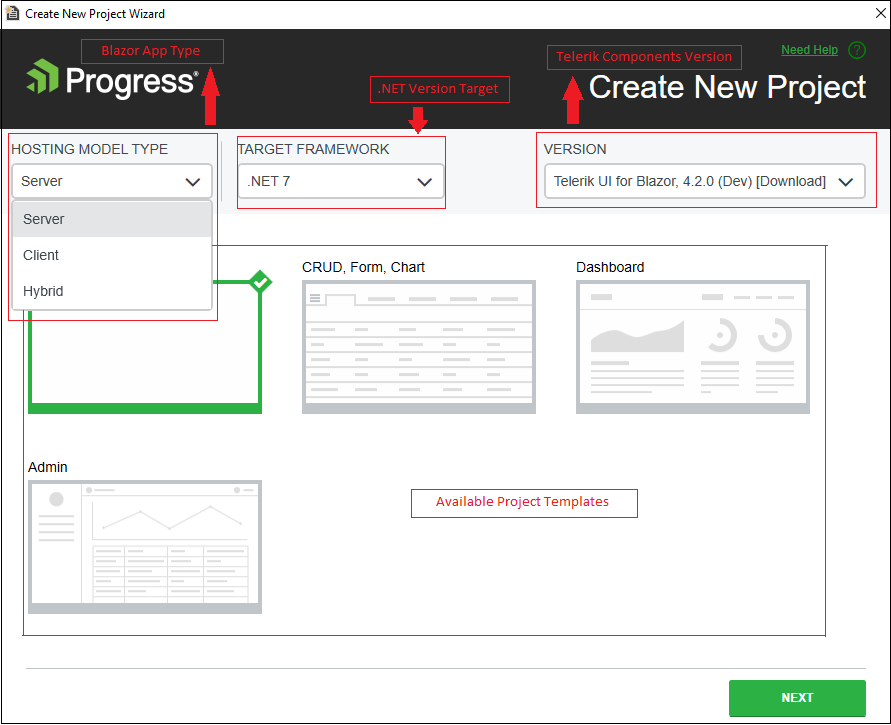
On the second screen, you can choose:
- A WebAssembly, server-side, or Hybrid Blazor app.
- The .NET version you want to use.
- The Telerik UI for Blazor version.
- One of the predefined Telerik project templates.
-
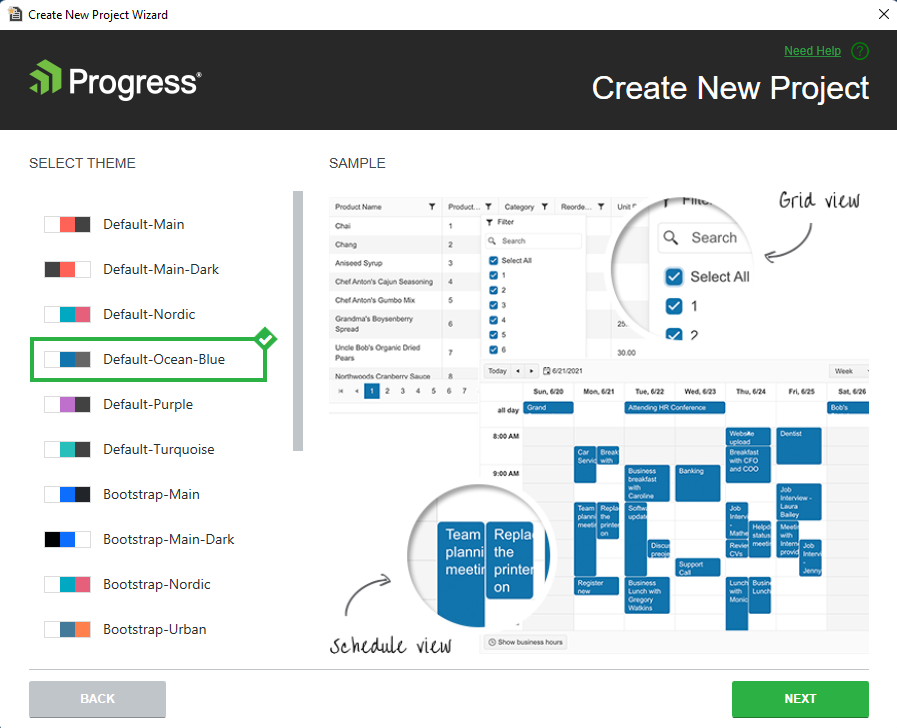
On the third screen, you can choose from different themes.
-
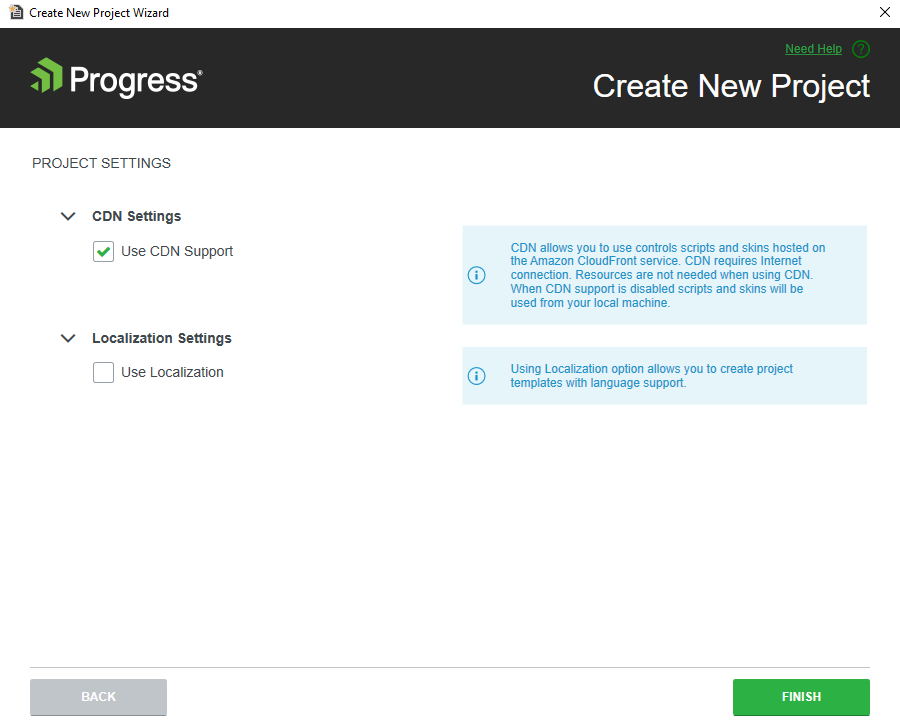
On the final screen, you need to decide the following:
- Whether to import the required Telerik UI stylesheet and JS Interop file by suing the static assets or the CDN method.
- Whether to use localization in the project or not.
Predefined Project Templates
The Create New Project wizard provides the following project templates:
-
Blank—A blank solution based on the Microsoft template with added Telerik UI components (NuGet package reference, assets, service, and the
TelerikRootComponent). - CRUD, Form, Chart—A small app that showcases the Telerik UI Data Grid, Chart, and forms validation. The Grid also uses a basic CRUD service which is a common pattern for data updates in real applications.
- Dashboard—A basic dashboard layout that uses the TileLayout component for customizable dashboards, and showcases several ways individual blocks (tiles) can fetch data.
- Admin—A small app that shows a dashboard for admin. The app uses some of the main Telerik UI components like the Data Grid, Chart, TileLayout, Form, and more.