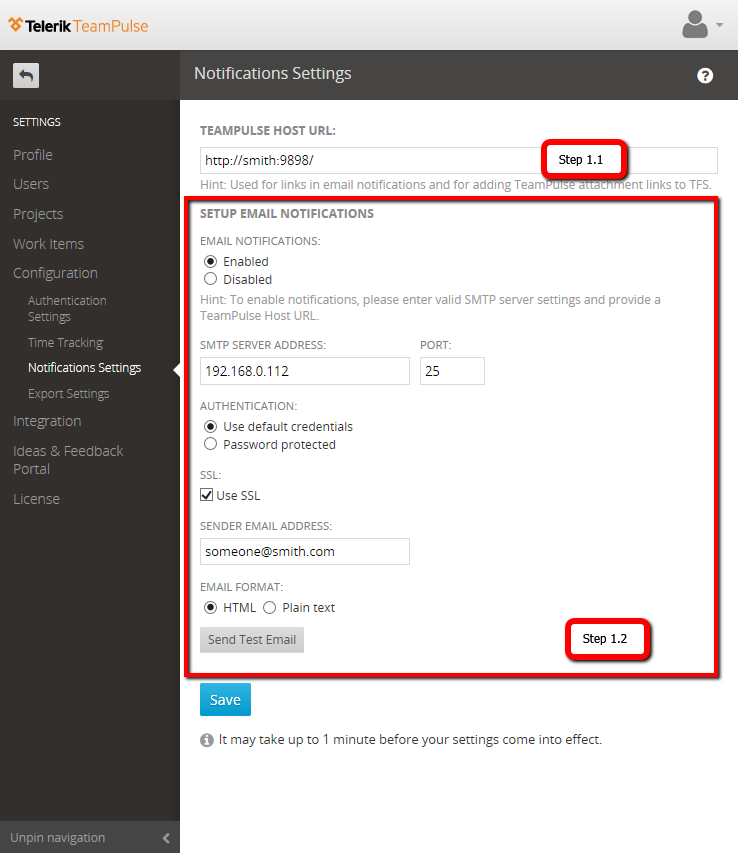
The purpose of this page is to give you an overall knowledge about the different Settings that exist in TeamPulse. In general, they are separated between Server and Project level, which is pinpointed below. TeamPulse Host URL is used to build up the links in email notifications and/or attachments links to TFS. Remember that this field is not used to change the TeamPulse domain, so leave it with the default value unless it necessary to change it.
1.2 Email Notification Setting Email Notification Settings are used when it is necessary to enable notifications from TeamPulse e.g. when changes on an items are applied. In order to activate them, you need to enter a correct SMTP Server address, and check the checkbox to enable the notifications for all projects. Learn more about subscribing to notifications 1.3 SMTP Server Settings Enabling Email Notifications for the Ideas & Feedback Portal checkbox is used to enable notifications for the feedback items in the Portal and can be checked only if step 1.2 is fulfilled. A permission group in TeamPulse allows or denies its members access to different areas or features of TeamPulse.
Only Project administrators (these are members of one of the default predefined permission groups) have the ability to define/modify permission groups. A detailed explanation of each permission in particular can be found here.
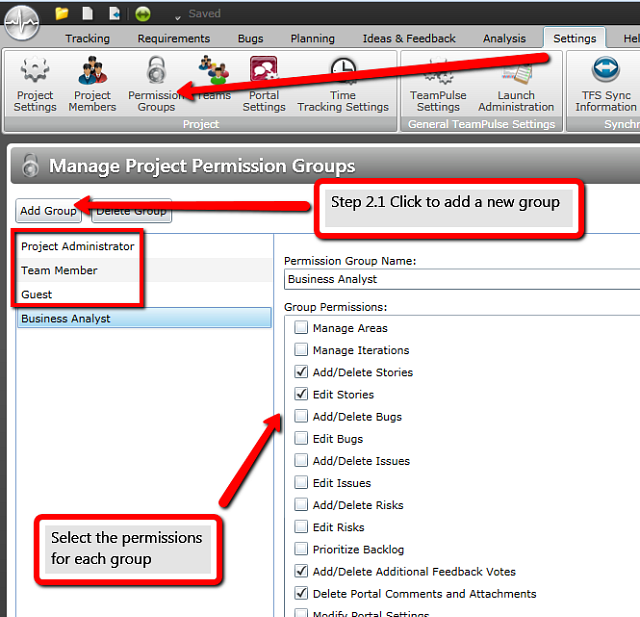
Add a New Permission Group Navigate to Settings >> Permission Groups. There are three permission groups that come predefined with the installation of TeamPulse - Project Administrator, Team Member and Guest. These groups are vital for the application and users are not allowed to edit or delete them.
Click “Add Group” button to add a new one for example “Business Analyst” and then select the particular permissions for this group, let’s say “Add/Delete Stories” (which will automatically make you choose “Edit Stories” as well), “Add/Delete Additional Feedback Votes” and “Delete Portal Comments and Attachments”.General Settings
Server-side Settings

Permission Groups
Edit/Delete a Permission Group
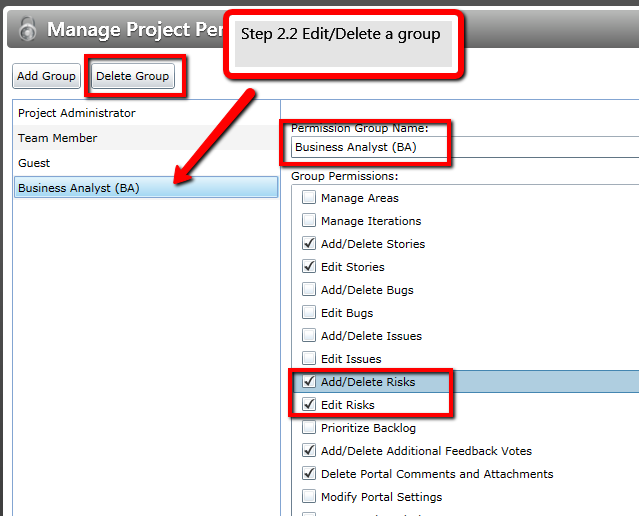
You can always to back and select a permission group of your choice, which will allow you to rename, edit or delete it. Select the “Business Analyst” group, add (BA) after is name and add the following permissions: “Add/Delete Risks” (which will automatically make you choose “Edit Risks” as well).
Permission groups can be deleted via the “Delete Group” button by the Project Administrators.
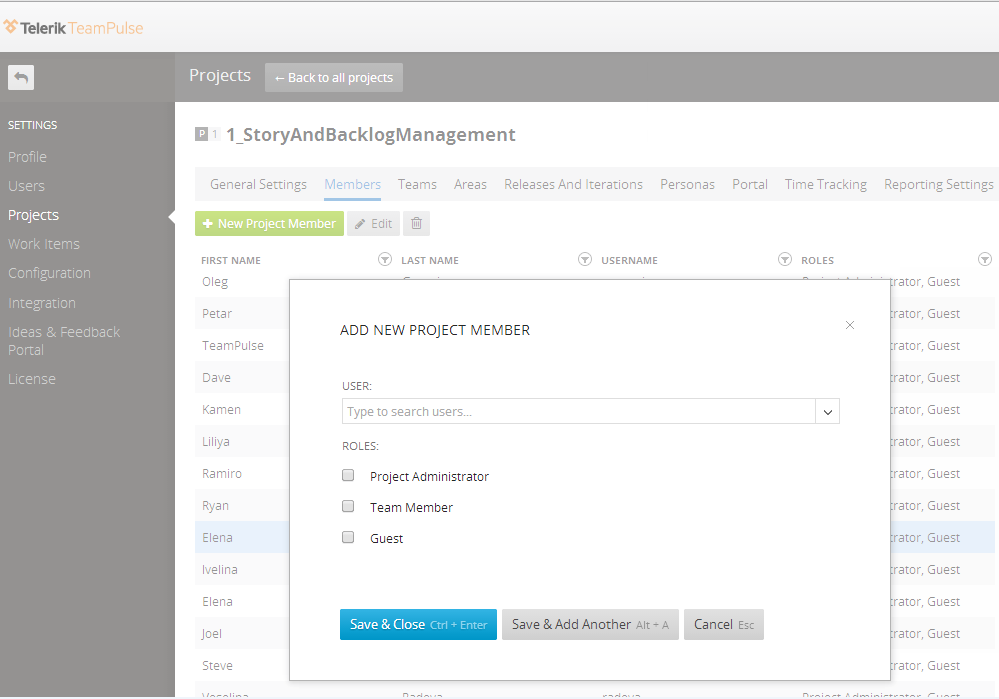
Project Members
From here, you can assign your team-members to a project and specific permission groups.
For someone to appear in this list, they need to have a TeamPulse license assigned to them. To manage the TeamPulse licenses you need to go to the “Administration” section (reference to step manage license?) When a new project is created, only the person who created the project has “Project Administrator” permissions applied.
Navigate to “Project Settings” >> “Members” and pick one of the licensed users and select a permission group from the checkboxes listed under "Role". Also when such permission is granted the user automatically becomes project member. And vice-versa, if you check the project member checkbox, the corresponding user automatically becomes “Team Member” which you can edit afterwards.
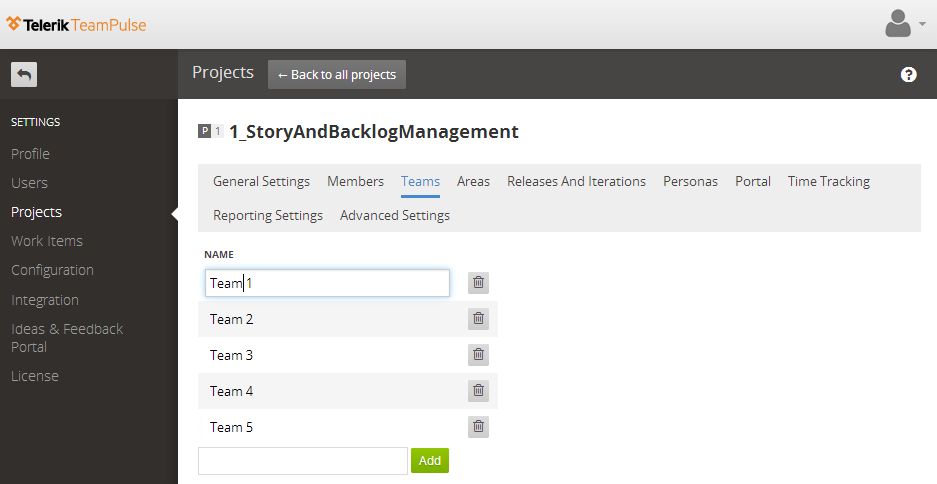
Teams
A team in TeamPulse is an entity to which different work items like stories, bugs, risks and issues can be assigned directly. The corresponding sorting, grouping and filtering options in TeamPulse contain a team criterion as well
Navigate to “Settings” >> Teams and use the corresponding buttons to add or remove the entities.
A full overview of how to use Teams in TeamPulse can be found here.
Time Tracking
Toggle the automatic calculation of work time completed ON or OFF
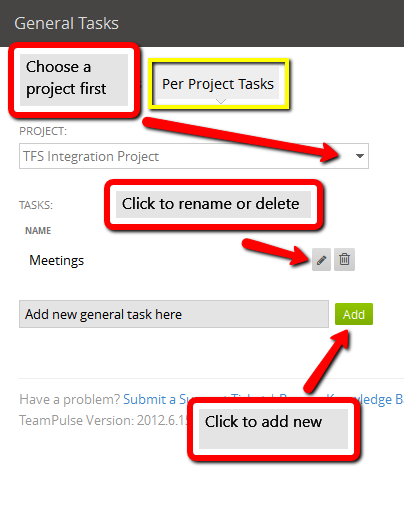
This option will allow you to choose whether you want time to be tracked using the entries you make against tasks or enter the time spent manually. When enabled, the work completed field will become read only, and its value will be modified strictly based on time entries made by users. When disabled, work completed values should be manually entered.Add General Tasks
You can create tasks which are not related to your work items and track time against them, like:
- Non-project tasks e.g. Vacations, note that only server administrators can add, edit and delete non-project general tasks, because they are actually outside the particular projects.

- Project-related tasks e.g. meetings, note that only users with "Project Administrator" permission for at least one project can manage the general per project tasks.
Detailed step by step guide how to create, modify and delete general tasks can be found here.
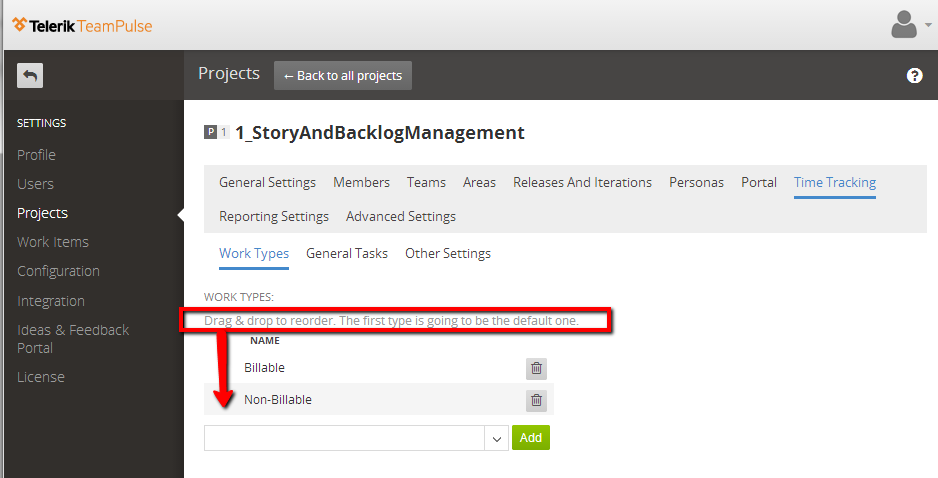
Create New Work Types
You can create your own work types to distinguish between the defaults billable and non-billable (these two are not required and you are free to delete them if they are not needed). For example, a new work type called “Research” can be added as per the snapshot below. Once a work type has been created, it can be selected wherever logging time.
You can delete work types from a project at any point and the time entries previously logged against it will be preserved. To delete a work type, go to the Work Types screen and click the "trash can" icon beside the item then should be deleted. Note that at this time there is no way to completely delete a work type from a server, so even if the work type is deleted from all projects, it will still appear as an option in the drop-down list on the Work Types screen.