ListView for Xamarin.iOS: Getting Started
This quick start tutorial demonstrates how to create a simple iOS application with TKListView.
Setting up TKListView
Now that our project is created and the TelerikUI.framework is added, we can start referencing and using the TelerikUI types:
Open your UIViewController file and add a reference to Telerik UI header file:
using TelerikUI;
Note that starting with Xcode 6 Apple doesn't generate the precompiled headers file automatically. That is why you should add import the UIKit framework before importing TelerikUI:
using UIKit;
In the ViewDidLoad method of your view controller prepare a small array of sample data to be presented in TKListView.
simpleArrayOfStrings = new NSMutableArray();
simpleArrayOfStrings.Add (new NSString ("Kristina Wolfe"));
simpleArrayOfStrings.Add (new NSString ("Freda Curtis"));
simpleArrayOfStrings.Add (new NSString ("Eva Lawson"));
simpleArrayOfStrings.Add (new NSString ("Emmett Santos"));
simpleArrayOfStrings.Add (new NSString ("Theresa Bryan"));
simpleArrayOfStrings.Add (new NSString ("Jenny Fuller"));
simpleArrayOfStrings.Add (new NSString ("Terrell Norris"));
simpleArrayOfStrings.Add (new NSString ("Eric Wheeler"));
simpleArrayOfStrings.Add (new NSString ("Julius Clayton"));
simpleArrayOfStrings.Add (new NSString ("Harry Douglas"));
simpleArrayOfStrings.Add (new NSString ("Eduardo Thomas"));
simpleArrayOfStrings.Add (new NSString ("Orlando Mathis"));
simpleArrayOfStrings.Add (new NSString ("Alfredo Thornton"));
Next, create an instance of TLKDataSource. This components is used to feed our data to TKListView.
dataSource.ItemSource = simpleArrayOfStrings;
Then create a new instance of TKListView and add it as a subview of the ViewController's main view. The AutoresizingMask property is set in order to allow correct resizing of the list view when the device is rotated in landscape mode.
TKListView listView = new TKListView ();
listView.Frame = new CGRect (0, 0, this.View.Bounds.Size.Width,this.View.Bounds.Size.Height-20);
listView.AutoresizingMask = UIViewAutoresizing.FlexibleWidth | UIViewAutoresizing.FlexibleHeight;
listView.WeakDataSource = dataSource;
this.View.AddSubview(listView);
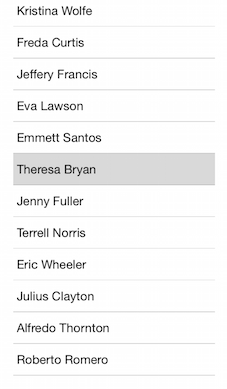
So far we have got the following view:
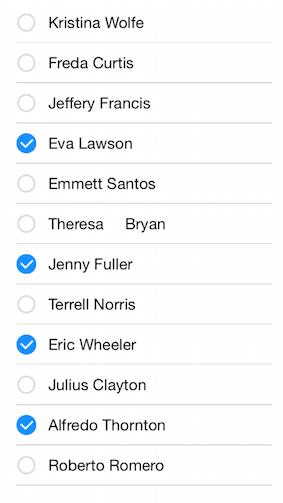
Enable Multiple selection:
listView.AllowsMultipleSelection = true;
To see the result, after running this sample, select to select a few items:
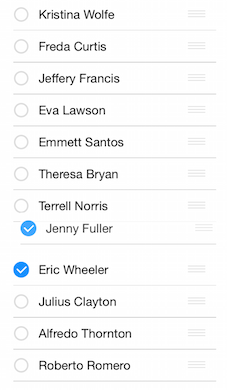
Enable Reordering
Adding a single line of code should allow the user to reorder items by dragging a handle.
listView.AllowsCellReorder = true;
A sample Getting Started example can be found in our Native Xamarin.iOS examples.