Create Appointment
This topic describes the work flow for creating an appointment in RadScheduleView control.
Using UI
RadScheduleView uses one and the same dialog to create and edit appointments. This topic describes the end-user's work flow for creating a new appointment.
- In order to create a new appointment just double click the time when you want the appointment to occur. In Day, Week or Timeline view, you can double-click on a specific starting time to create an appointment. In Month view, appointments always start out as all-day events. The edit appointment dialog appears:
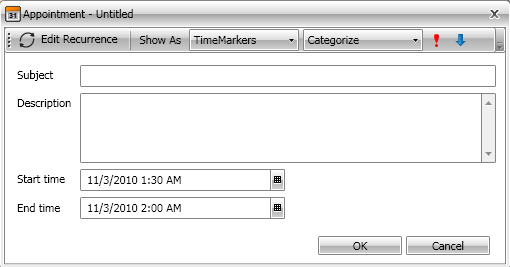
Enter Subject, Description, Start and End time of the appointment. Keep in mind that the subject text will be displayed as label for this appointment in the schedule view.
You can also assign a category, time marker or importance by using the tool bar controls.
If you have completed the appointment edit, click the 'OK' button or press the Enter key. If you want to cancel the appointment creation, click the X button, the Close button or press the Esc key.
Using code
You can add new appointment using the code. Here are the steps to accomplish this:
Call CreateNew() method of the RadScheduleView control. It creates an instance of the IAppointment class and returns it. This method has 2 overloads:
Set the properties for the new appointment.
Call Commit() method to commit the changes to this object and to update the UI.
IAppointment appointment = this.radScheduleView.CreateNew();
appointment.Start = DateTime.Now;
appointment.End = DateTime.Now.AddHours(1);
appointment.Subject = "New appointment";
this.radScheduleView.Commit();
Dim appointment As IAppointment = Me.radScheduleView.CreateNew()
appointment.Start = DateTime.Now
appointment.End = DateTime.Now.AddHours(1)
appointment.Subject = "New appointment"
Me.radScheduleView.Commit()