Camera Behavior
The camera behavior allows you to control the point of view using the input device (mouse or touch). To enable the behavior you can add a Chart3DCameraBehavior object in the Behaviors collection of the RadCartesianChart3D control.
Example 1: Defining camera behavior
<telerik:RadCartesianChart3D>
    <telerik:RadCartesianChart3D.Behaviors>
        <telerik:Chart3DCameraBehavior/>
    </telerik:RadCartesianChart3D.Behaviors>
</telerik:RadCartesianChart3D>
- Rotating the camera
- Changing the camera distance
- Changing the field of view angle
- Restricting the camera
Rotating the camera
The camera is rotated when you mouse down on the chart and move the mouse. You can use the behavior's FirstAngle and SecondAngle properties to rotate the camera manually.
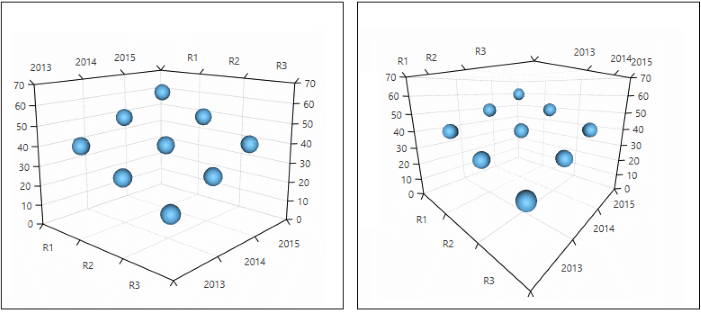
Figure 1: Rotating the camera
Example 2: Setting the camera angles
<telerik:Chart3DCameraBehavior FirstAngle="300" SecondAngle="80" />
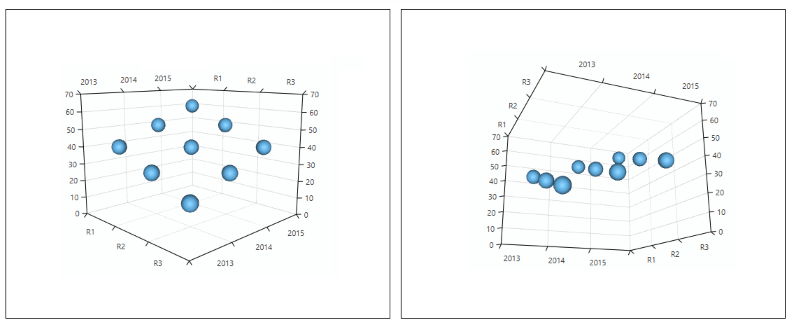
Figure 2: FirstAngle example
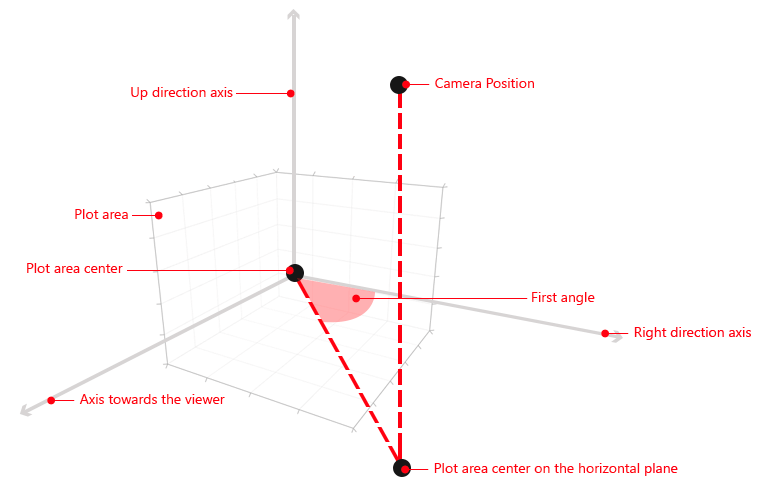
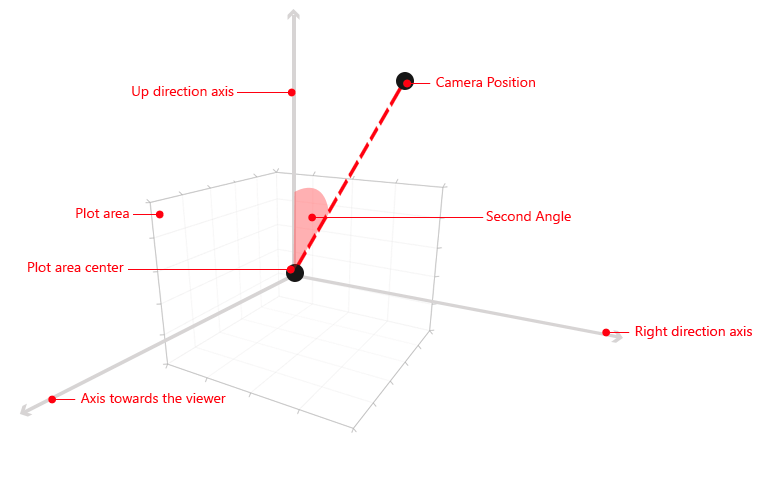
SecondAngle is the angle between the UpDirection axis and the line between the camera position and plot area center.
Figure 3: SecondAngle example
The camera behavior allows you to define custom key combinations that activate the rotation while dragging. You can do that via the DragToRotateKeyCombinations collection.
Example 3: Defining drag-to-rotate key combination
ChartKeyCombination keyCombination = new ChartKeyCombination();
keyCombination.Keys.Add(Key.LeftCtrl);
keyCombination.MouseButtons.Add(MouseButton.Right);
cameraBehavior.DragToRotateKeyCombinations.Add(keyCombination);
Changing the camera distance
To change the distance you can use the mouse wheel. You can use the Distance property to control it manually.
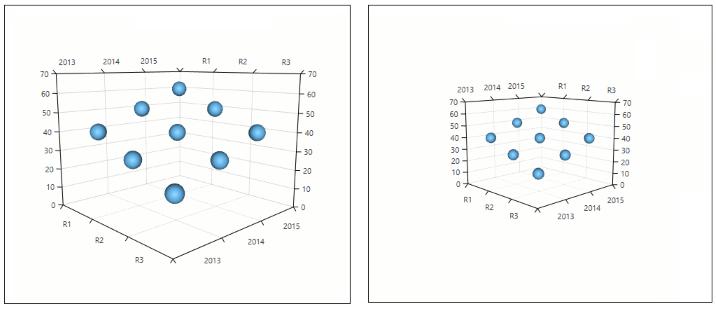
Figure 4: Changing the camera distance
Example 4: Changing the distance
<telerik:Chart3DCameraBehavior Distance="2300" >
The distance has different meaning for different cameras. When a PerspectiveCamera is in use the distance is the radius of the sphere that the camera is positioned on. When an OrthographicCamera is in use the distance is the width of the camera.
Changing the field of view angle
To change the field of view you can use the combination between the Shift key and mouse wheel. You can use the FieldOfView property to change the field of view manually.
The field of view angle is available only with a PerspectiveCamera.
Figure 5: Changing the camera distance
Example 5: Manually setting the field of view
<telerik:Chart3DCameraBehavior FieldOfView="45" >
The camera behavior allows you to define custom modifier keys that activate the field of view updating on mouse wheel. You can do that via the FieldOfViewModifierKeys collection. The field of view will be updated when at least one of these keys is pressed.
Example 6: Defining field of view modifier key
cameraBehavior.FieldOfViewModifierKeys.Add(Key.F);
Restricting the camera
You can use the MaxDistance, MinDistance, MinSecondAngle, MaxSecondAngle properties to restrict the area that can be observed by the camera.
Example 7: Restricting the camera
<telerik:Chart3DCameraBehavior MinDistance="400"
                               MaxDistance="4000"
                               MinSecondAngle="20"
                               MaxSecondAngle="130" />
Up direction
The up direction of the camera is defined by the UpDirection property which is a 3D Vector. The default up direction is the Z axis.
Lights
When the camera behavior is enabled the lights direction is determined by the camera position. So, when you rotate the camera the lights will also be rotated accordingly to the camera. This behavior can be toggled via the CameraBehavior3D.IsRotationEnabled attached property. Its default value is True. To avoid rotating the light you can set it to False. This is useful when you want to have static lights that illuminate the scene.
Example 8: Disabling the automatic rotation of a light in XAML
<telerik:RadCartesianChart3D.Lights>
    <DirectionalLight telerik:Chart3DCameraBehavior.IsRotationEnabled="False" />
</telerik:RadCartesianChart3D.Lights>
Example 9: Disabling the automatic rotation of a light in code
Chart3DCameraBehavior.SetIsRotationEnabled(light, false);