Getting Started with WPF Carousel
This tutorial will walk you through the creation of a simple application containing RadCarousel and will show you how to:
For the purpose of this example, you will need to create an empty WPF Application in Visual Studio.
Add RadCarousel to Your Project
Once a new WPF project is created, you will need to add references to the assemblies:
Telerik.Windows.Controls;
Telerik.Windows.Controls.Navigation;
Telerik.Windows.Data;
Next, you need to add RadCarousel to your application. You may set some of its basic properties like Background or Height. Bear in mind that you will need to define the telerik namespace. Furthermore, if you want to access it in the code-behind, you may declare its Name attribute:
Example 1: Adding RadGridView to application
<UserControl xmlns:telerik="http://schemas.telerik.com/2008/xaml/presentation">
  <telerik:RadCarousel x:Name="MyCarousel" Background="Black" Height="400" />
</UserControl>
Bind RadCarousel to a Collection of Custom Objects
For the purpose of this tutorial we will create a new Employee class with a couple of properties:
Example 2: The Employee class
public class Employee
{
    public string FirstName
    {
        get;
        set;
    }
    public string LastName
    {
        get;
        set;
    }
    public int Age
    {
        get;
        set;
    }
    public string Position
    {
        get;
        set;
    }
}
Public Class Employee
    Public Property FirstName() As String
        Get
            Return m_FirstName
        End Get
        Set
            m_FirstName = Value
        End Set
    End Property
    Private m_FirstName As String
    Public Property LastName() As String
        Get
            Return m_LastName
        End Get
        Set
            m_LastName = Value
        End Set
    End Property
    Private m_LastName As String
    Public Property Age() As Integer
        Get
            Return m_Age
        End Get
        Set
            m_Age = Value
        End Set
    End Property
    Private m_Age As Integer
    Public Property Position() As String
        Get
            Return m_Position
        End Get
        Set
            m_Position = Value
        End Set
    End Property
    Private m_Position As String
End Class
Furthermore, as some data will be needed, we will create EmployeeService class that provides a static GetEmployees() method:
Example 3: The EmployeeService class
public class EmployeeService
{
    public static ObservableCollection<Employee> GetEmployees()
    {
        ObservableCollection<Employee> employees = new ObservableCollection<Employee>();
        Employee employee = new Employee();
        employee.FirstName = "Margaret";
        employee.LastName = "Peacock";
        employee.Position = "Sales Representative";
        employee.Age = 24;
        employees.Add(employee);
        employee = new Employee();
        employee.FirstName = "Steven";
        employee.LastName = "Buchanan";
        employee.Position = "Sales Manager";
        employee.Age = 44;
        employees.Add(employee);
        employee = new Employee();
        employee.FirstName = "Michael";
        employee.LastName = "Suyama";
        employee.Position = "Sales Representative";
        employee.Age = 33;
        employees.Add(employee);
        employee = new Employee();
        employee.FirstName = "Robert";
        employee.LastName = "King";
        employee.Position = "Sales Representative";
        employee.Age = 28;
        employees.Add(employee);
        employee = new Employee();
        employee.FirstName = "Laura";
        employee.LastName = "Callahan";
        employee.Position = "Inside Sales Coordinator";
        employee.Age = 26;
        employees.Add(employee);
        employee = new Employee();
        employee.FirstName = "Anne";
        employee.LastName = "Dodsworth";
        employee.Position = "Sales Representative";
        employee.Age = 30;
        employees.Add(employee);

        return employees;
    }
}
Public Class EmployeeService
    Public Shared Function GetEmployees() As ObservableCollection(Of Employee)
        Dim employees As New ObservableCollection(Of Employee)()
        Dim employee As New Employee()
        employee.FirstName = "Margaret"
        employee.LastName = "Peacock"
        employee.Position = "Sales Representative"
        employee.Age = 24
        employees.Add(employee)
        employee = New Employee()
        employee.FirstName = "Steven"
        employee.LastName = "Buchanan"
        employee.Position = "Sales Manager"
        employee.Age = 44
        employees.Add(employee)
        employee = New Employee()
        employee.FirstName = "Michael"
        employee.LastName = "Suyama"
        employee.Position = "Sales Representative"
        employee.Age = 33
        employees.Add(employee)
        employee = New Employee()
        employee.FirstName = "Robert"
        employee.LastName = "King"
        employee.Position = "Sales Representative"
        employee.Age = 28
        employees.Add(employee)
        employee = New Employee()
        employee.FirstName = "Laura"
        employee.LastName = "Callahan"
        employee.Position = "Inside Sales Coordinator"
        employee.Age = 26
        employees.Add(employee)
        employee = New Employee()
        employee.FirstName = "Anne"
        employee.LastName = "Dodsworth"
        employee.Position = "Sales Representative"
        employee.Age = 30
        employees.Add(employee)
        Return employees
    End Function
End Class
Once all the data is prepared, we may set the RadCarousel's ItemsSource:
Example 4: Setting RadCarousel's ItemsSource
this.MyCarousel.ItemsSource = EmployeeService.GetEmployees();
Me.MyCarousel.ItemsSource = EmployeeService.GetEmployees()
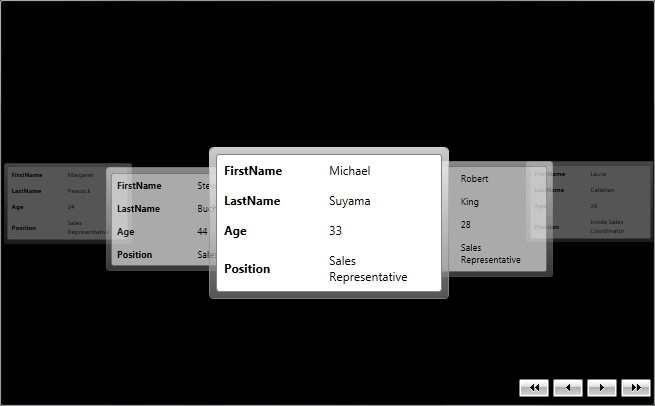
After running the application, you will see the following result:
Figure 1: RadCarousel displaying a list of employees
Display images in RadCarousel
Generally, RadCarousel may be easily used for displaying images and navigating through them. All you need to do is to add those that you want to be visualized in a List
Example 5: Setting RadCarousel's ItemsSource to a list of images
List<Image> myImages = new List<Image>();
Image myImage = new Image();
myImage.Source = new BitmapImage(new Uri("/Images/nature1.jpg", UriKind.Relative));
myImage.Height = 200;
myImage.Width = 200;
myImages.Add(myImage);
Image myImage1 = new Image();
myImage1.Source = new BitmapImage(new Uri("/Images/nature2.jpg", UriKind.Relative));
myImage1.Height = 200;
myImage1.Height = 200;
myImages.Add(myImage1);
Image myImage2 = new Image();
myImage2.Source = new BitmapImage(new Uri("/Images/nature15.jpg", UriKind.Relative));
myImage2.Width = 200;
myImage.Height = 200;
myImages.Add(myImage2);
Image myImage3 = new Image();
myImage3.Source = new BitmapImage(new Uri("/Images/nature19.jpg", UriKind.Relative));
myImage3.Height = 200;
myImage3.Width = 200;
myImages.Add(myImage3);
Image myImage4 = new Image();
myImage4.Source = new BitmapImage(new Uri("/Images/nature26.jpg", UriKind.Relative));
myImage4.Height = 200;
myImage4.Width = 200;
myImages.Add(myImage4);
this.MyCarousel.ItemsSource = myImages;
Dim myImages As New List(Of Image)()
Dim myImage As New Image()
myImage.Source = New BitmapImage(New Uri("/Images/nature1.jpg", UriKind.Relative))
myImage.Height = 200
myImage.Width = 200
myImages.Add(myImage)
Dim myImage1 As New Image()
myImage1.Source = New BitmapImage(New Uri("/Images/nature2.jpg", UriKind.Relative))
myImage1.Height = 200
myImage1.Height = 200
myImages.Add(myImage1)
Dim myImage2 As New Image()
myImage2.Source = New BitmapImage(New Uri("/Images/nature15.jpg", UriKind.Relative))
myImage2.Width = 200
myImage.Height = 200
myImages.Add(myImage2)
Dim myImage3 As New Image()
myImage3.Source = New BitmapImage(New Uri("/Images/nature19.jpg", UriKind.Relative))
myImage3.Height = 200
myImage3.Width = 200
myImages.Add(myImage3)
Dim myImage4 As New Image()
myImage4.Source = New BitmapImage(New Uri("/Images/nature26.jpg", UriKind.Relative))
myImage4.Height = 200
myImage4.Width = 200
myImages.Add(myImage4)
Me.MyCarousel.ItemsSource = myImages
Figure 2 shows the final result:
Figure 2: RadCarousel displaying a list of images

Setting a Theme
The controls from our suite support different themes. You can see how to apply a theme different than the default one in the Setting a Theme help article.
Changing the theme using implicit styles will affect all controls that have styles defined in the merged resource dictionaries. This is applicable only for the controls in the scope in which the resources are merged.
To change the theme, you can follow the steps below:
Choose between the themes and add reference to the corresponding theme assembly (ex: Telerik.Windows.Themes.Material.dll). You can see the different themes applied in the Theming examples from our WPF Controls Examples application.
-
Merge the ResourceDictionaries with the namespace required for the controls that you are using from the theme assembly. For the RadCarousel, you will need to merge the following resources:
- Telerik.Windows.Controls
- Telerik.Windows.Controls.Navigation
Example 2 demonstrates how to merge the ResourceDictionaries so that they are applied globally for the entire application.
Example 2: Merge the ResourceDictionaries
<Application.Resources>
    <ResourceDictionary>
        <ResourceDictionary.MergedDictionaries>
            <ResourceDictionary Source="/Telerik.Windows.Themes.Material;component/Themes/System.Windows.xaml"/>
            <ResourceDictionary Source="/Telerik.Windows.Themes.Material;component/Themes/Telerik.Windows.Controls.xaml"/>
            <ResourceDictionary Source="/Telerik.Windows.Themes.Material;component/Themes/Telerik.Windows.Controls.Navigation.xaml"/>
        </ResourceDictionary.MergedDictionaries>
    </ResourceDictionary>
</Application.Resources>
Alternatively, you can use the theme of the control via the StyleManager.
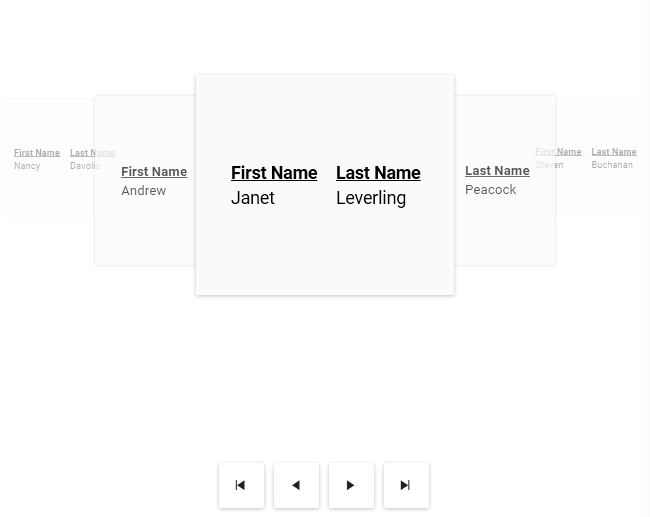
Figure 4 shows a RadCarousel with the Material theme applied.
Figure 4: RadCarousel with the Material theme
Telerik UI for WPF Learning Resources
- Telerik UI for WPF Carousel Component
- Getting Started with Telerik UI for WPF Components
- Telerik UI for WPF Installation
- Telerik UI for WPF and WinForms Integration
- Telerik UI for WPF Visual Studio Templates
- Setting a Theme with Telerik UI for WPF
- Telerik UI for WPF Virtual Classroom (Training Courses for Registered Users)
- Telerik UI for WPF License Agreement