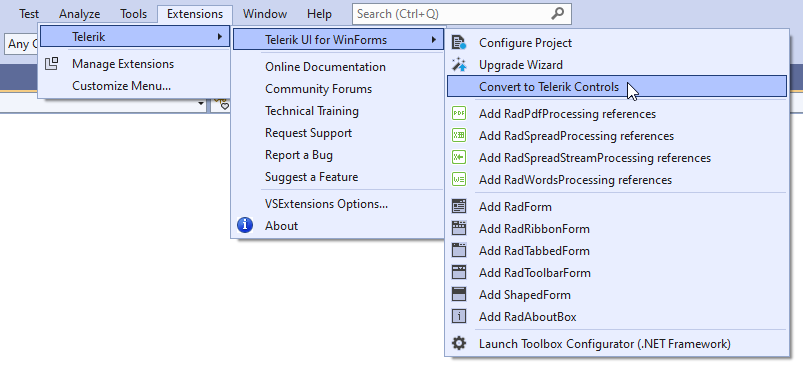
Convert your existing application to Telerik UI for Winforms
This article will guide you through the process of converting the Microsoft Windows Forms controls in your application to Telerik UI for Winforms counterparts.
We strongly recommend you using a source control system like TFS or Git. This will allow you to review the changes and restore to previous version if needed.
1. Before starting you need to open a solution which contains a project that is using standard Microsoft Winforms controls. This will enable the converter option in the UI for WinForms menu item.
Make sure that you meet the Requirements for the Converter Tool.
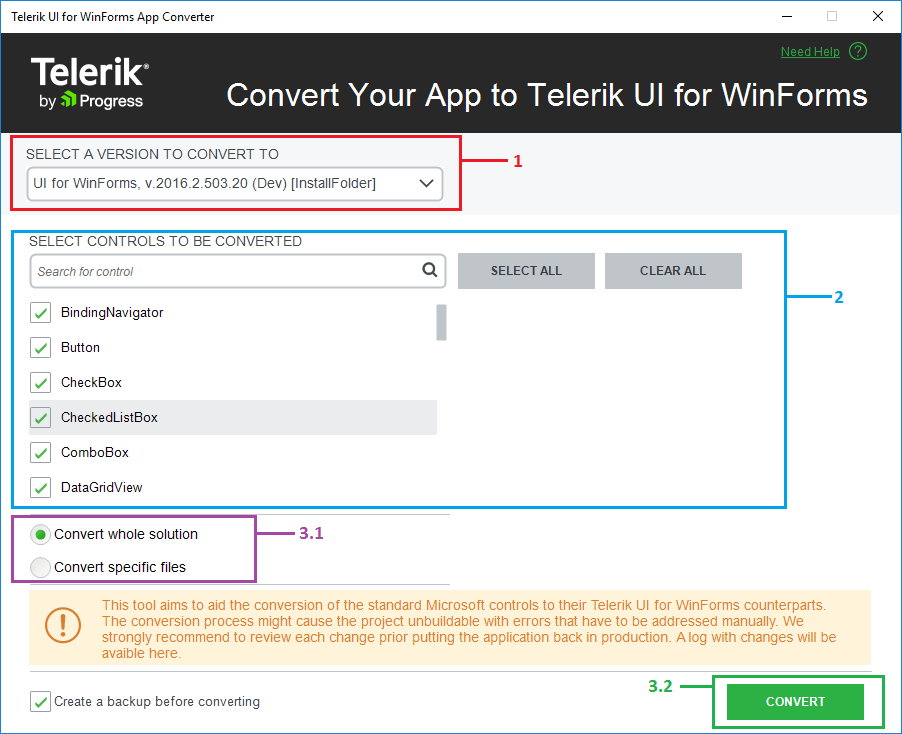
2. Clicking the menu item will open the following window where you can perform the following actions:
1. Select a version - you can choose between all installed versions, including the ones for .NET 2.0 and .NET 4.0.
2. Select controls - you can choose which controls you can convert. For this example leave all controls selected.
3.1 Convert whole solution and Convert specific files options - you can control whether to convert the whole application or specify which files exactly to be converted.
3.2 The Convert button - pressing this button will start the conversion process. Please note that you cannot go back to this window.
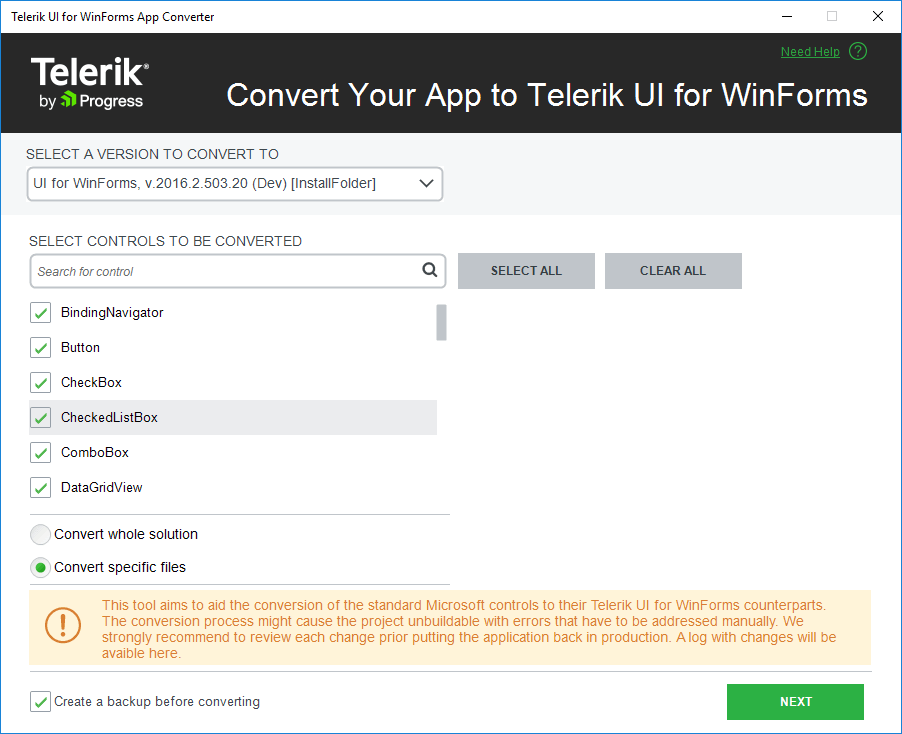
3.1 If you choose the Convert specific files option, press Next.
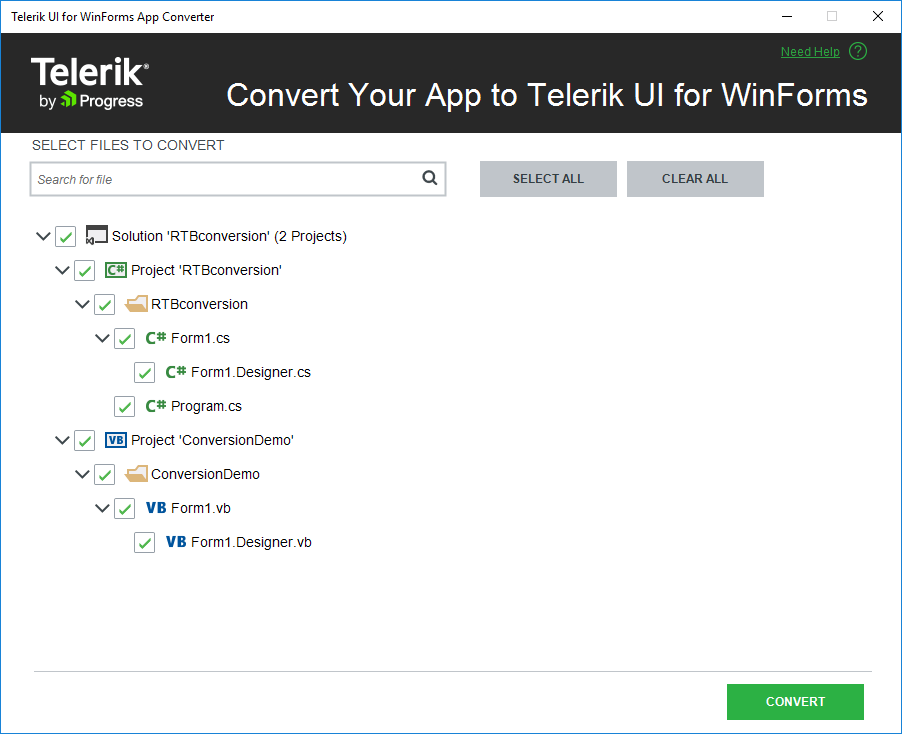
You will be navigated to a step to choose which files to be converted. Then press Convert:
3.2 If you choose the Convert whole solution option, press Convert and wait until the project is converted. Once the conversion process is complete, the summary dialog will appear. This will allow you to see which files are converted. You can open the generated log as well.
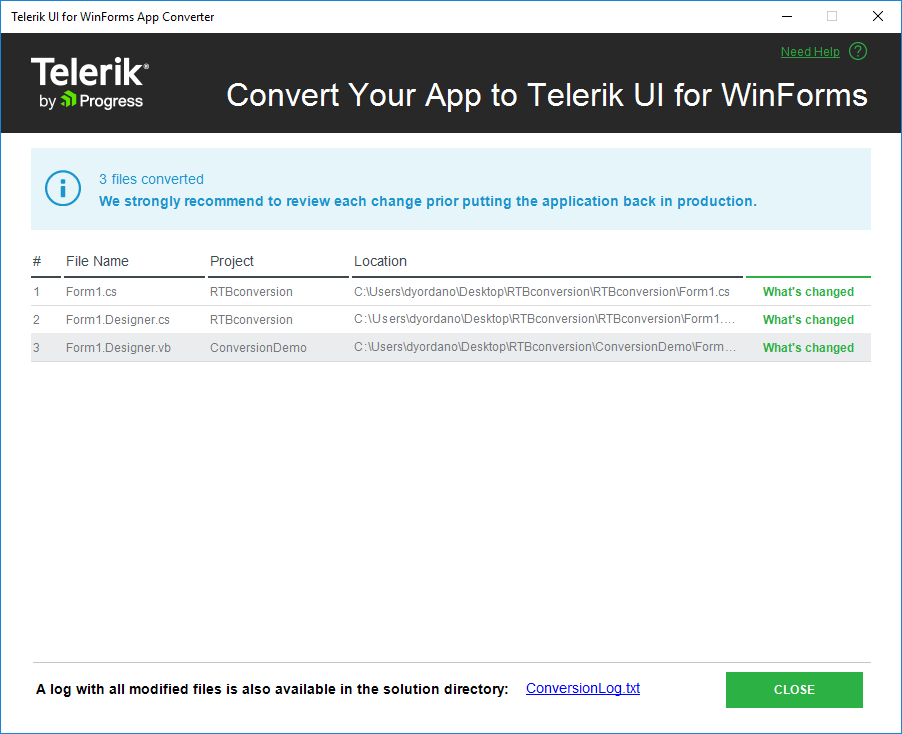
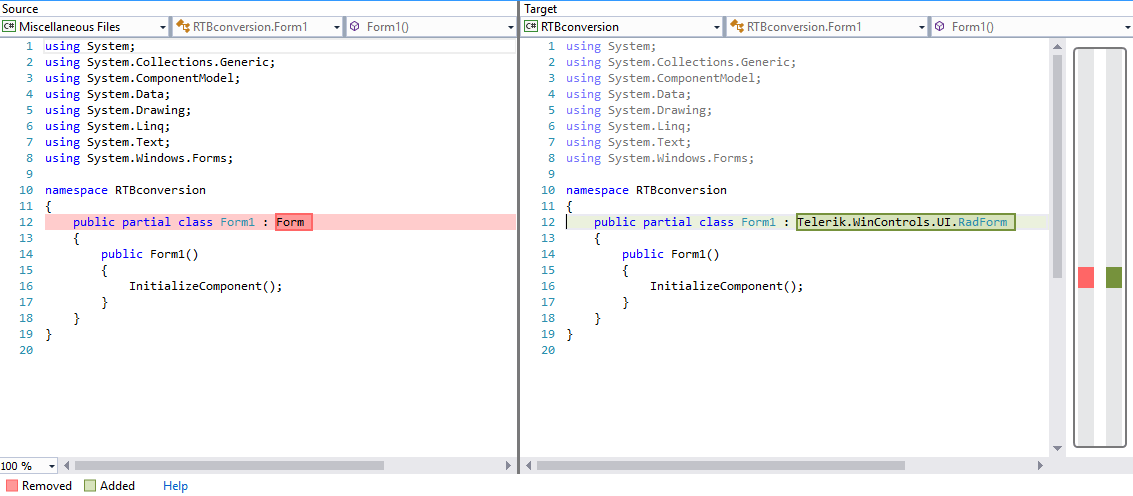
At this step you can compare the old and the converted files. To do that just click the What's Changed link in the file list. This will open the files tabs in Visual Studio and you will be able to review the changed code.
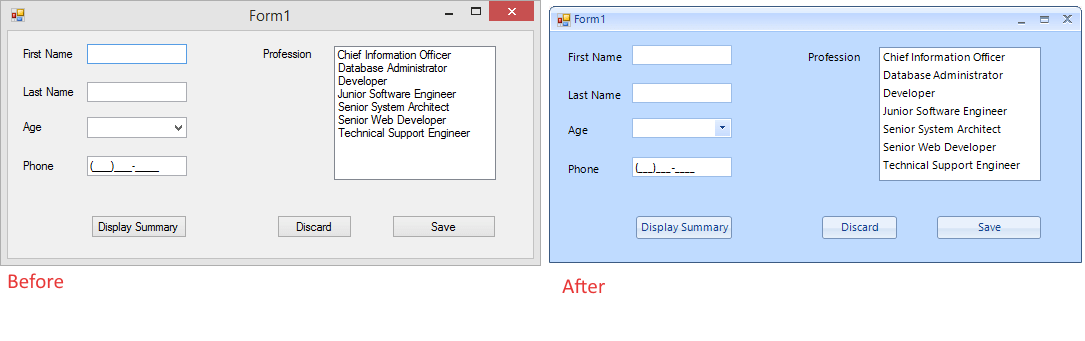
4. Click Close and open the designer in the converted project. You will see that the project and the controls are now converted. The following image shows the application before and after the conversion process.
5. The final step is to resolve any compile time errors. There are properties and methods which do not have analogs in our implementation. Since the converter does not remove the code for these, you will get a compile time error:

It would be necessary to fine-tune the events' subscriptions in the Designer.cs file to include the new System.EventHandler part since it is removed by Roslyn after converting is completed. Example: this.button1.Click += new System.EventHandler(this.button1_Click);
More information is available in How to Deal with Disappearing Event Handlers after Opening the Designer for a Converted WinForms Project.
After the conversion process is completed, you should check if all existing functionality is working as before.