Data Binding
RadTileView can be bound to a collection of objects through its ItemsSource property.
Note that for every business object from the data bound collection, RadTileView will generate a RadTileViewItem container representing this object.
This article describes how to data bind business objects to RadTileView.
-
Create a new class named CustomerAccount. The structure of the class is shown in Example 2.
Example 1: The business class that will be used as a model of the tileview items
    public class CustomerAccount
    {
        public string Name { get; set; }
        public string City { get; set; }
        public string Description { get; set; }
    }
Public Class CustomerAccount Private _Name As String Public Property Name() As String Get Return _Name End Get Set(ByVal value As String) _Name = value End Set End Property Private _City As String Public Property City() As Integer Get Return _City End Get Set(ByVal value As Integer) _City = value End Set End Property Private _Description As String Public Property Balance() As String Get Return _Description End Get Set(ByVal value As String) _Description = value End Set End Property End Class -
Create a class that defines a collection of business objects.
Example 2: The class that holds a collection of the business objects.
    public class BankViewModel
    {
        public ObservableCollection<CustomerAccount> Customers { get; set; }

        public BankViewModel()
        {
            this.Customers = new ObservableCollection<CustomerAccount>();
            this.AddCustomers();
        }

        public void AddCustomers()
        {
            this.Customers.Add(new CustomerAccount()
            {
                Name = "Michael Johnson",
                City = "New York",
                Description = "Lorem ipsum dolor sit amet ..."
            });
            this.Customers.Add(new CustomerAccount()
            {
                Name = "Alan Rickman",
                City = "Boston",
                Description = "Lorem ipsum dolor sit amet ..."
            });
        }
    }
Public Class BankViewModel Public Property Customers() As ObservableCollection(Of CustomerAccount) Get Return m_Customers End Get Set m_Customers = Value End Set End Property Private m_Customers As ObservableCollection(Of CustomerAccount) Public Sub New() Me.Customers = New ObservableCollection(Of CustomerAccount)() Me.AddCustomers() End Sub Public Sub AddCustomers() Me.Customers.Add(New CustomerAccount() With { .Name = "Michael Johnson", .City = "New York", .Description = "Lorem ipsum dolor sit amet ..." }) Me.Customers.Add(New CustomerAccount() With { .Name = "Alan Rickman", .City = "Boston", .Description = "Lorem ipsum dolor sit amet ..." }) End Sub End ClassAs you can see, the BankViewModel class has a reference to an ObservableCollection of CustomerAccount objects. This collection is populated in the AddCustomers() method and it will be bound to the ItemsSource property of RadTileView.
-
Set the DataContext of your application to a new instance of the created view model.
Example 3: Setting the DataContext of the application.
    public UserControl()
    {
        InitializeComponent();
        this.DataContext = new BankViewModel();
    }
Public Sub New() InitializeComponent() Me.DataContext = New BankViewModel() End Sub -
Then bind the ItemsSource property to the collection of the view model.
Example 4: Setting the ItemsSource of the RadTileView control.
<telerik:RadTileView x:Name="xTileView" ItemsSource="{Binding Customers}" /> -
The result should be similar to Figure 1.
Figure 1: RadTileView after binding its ItemSource property
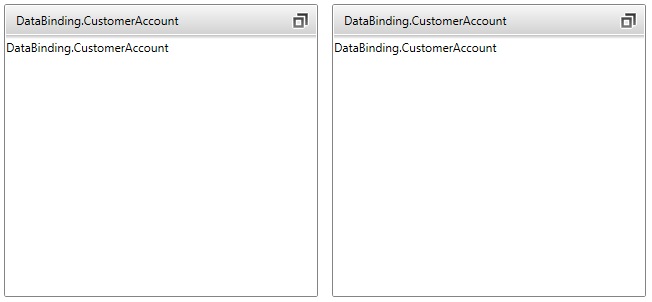
Notice that the RadTileViewitems displays the name of the view model. This is because by default, the RadTileView will display the result returned from the ToString() method of the model. To change the appearance of the items you can explicitly define what to display in the header and the content of the items. You can see how to do that in the next section.
Using custom templates
This section describes how to define the appearance of the header and content of a RadTileViewItems.
You can modify the visual appearance of the item's header using either the ItemTemplate property or the DisplayMemberPath property.
-
Using the ItemTemplate property
Create a DataTemplate and set it to the RadTileView's ItemTemplate property.
Example 5: Declaring the DataTemplate
Update the RadTileView's declaration and set its ItemTemplate property like in the example below:<DataTemplate x:Key="ItemTemplate"> <TextBlock Text="{Binding Name}" /> </DataTemplate>Example 6: Declaring the DataTemplate
<telerik:RadTileView x:Name="xTileView" ItemsSource="{Binding Customers}" ItemTemplate="{Binding ItemTemplate}"/> -
Using the DisplayMemberPath property
Instead of creating a custom ItemTemplate, you can use the DisplayMemberPath property, which you can use to get or set a path to a value on the source object to serve as the visual representation of the object.
Example 7 demonstrates how to set the DisplayMemberPath property.
Example 7: Setting the DisplayMemberPath
    <telerik:RadTileView x:Name="xTileView"
                         DisplayMemberPath="Name"
                         ItemsSource="{Binding Customers}"/>
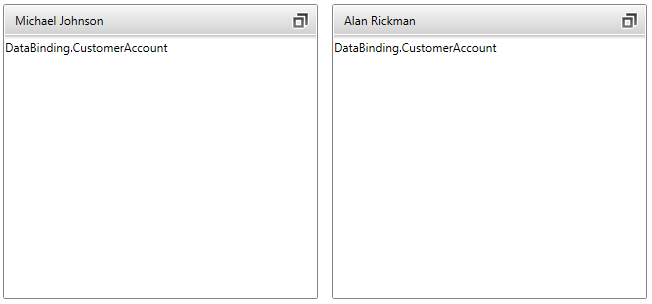
Figure 2 shows the end result.
Figure 2: RadTileView after using DisplayMemberPath property.
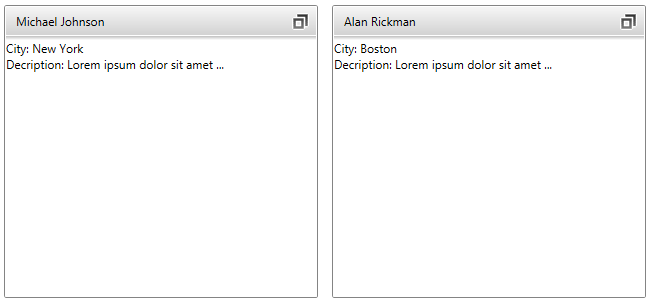
You can modify the visual appearance of the item's content using the ContentTemplate property of RadTileView.
Example 8: Declaring the content DataTemplate
<DataTemplate x:Key="ContentTemplate">
    <StackPanel>
        <TextBlock Text="{Binding City,StringFormat='City: {0}'}"/>
        <TextBlock Text="{Binding Description,StringFormat='Decription: {0}'}" TextWrapping="Wrap"/>
    </StackPanel>
</DataTemplate>
Example 9: Declaring the content DataTemplate
<telerik:RadTileView ItemsSource="{Binding Customers}"
                     DisplayMemberPath="Name"
                     ContentTemplate="{StaticResource ContentTemplate}"/>
Figure 3: Final result
Find a runnable project of the previous example in the WPF Samples GitHub repository.