Getting Started with the Telerik WebForms Spell
The following tutorial demonstrates using RadSpell to spell check a standard ASP.NET TextBox control using either an English or French dictionary. The walk-through will also show how to change the skin of the spell check dialog.

In the default page of a new ASP.NET AJAX-enabled Web Application add a TextBox control and a RadSpell control.
In the Solution Explorer, right-click the project and select Add | Add ASP.NET Folder | App_GlobalResources.
In the Solution Explorer, right-click the project and select Add | Add ASP.NET Folder | App_Data.
Locate the App_GlobalResources and App_Data folders in your Telerik® UI for ASP.NET AJAXTelerik UI installation folder.
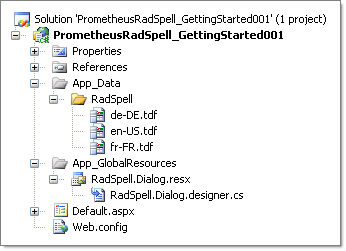
Copy the App_Data\RadSpell to the project's \App_Data folder.
Copy the App_GlobalResources\RadSpell.Dialog.resx to the project's \App_GlobalResources folder.
-
The project structure should now look like the screenshot below.
Set the TextBox Text property to "mispleng";
-
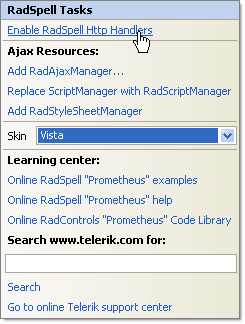
Open the RadSpell Smart Tag and select the Vista Skin from the drop down menu. Select the Enable RadSpell Http Handlers link. Click OK to close the confirmation dialogs for the spell check and dialog handlers.
-
In the Properties Window for the RadSpell control set the following properties:
- ButtonType = LinkButton
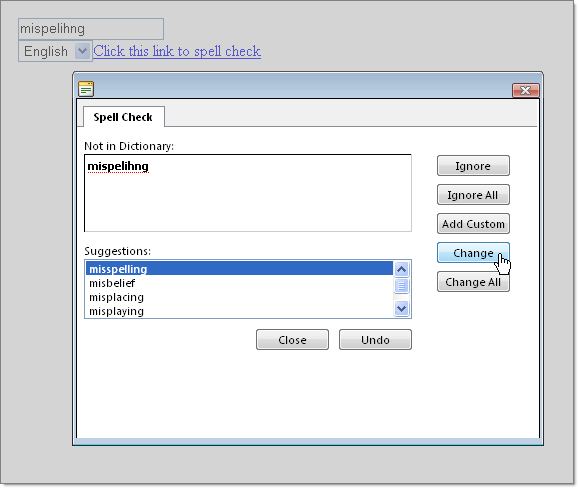
- ButtonText = "Click this link to spell check"
- ControlToCheck = "TextBox1"
- SupportedLanguages = en-US,English,fr-FR,French"
-
Press F5 to run the application. Use the drop down list to select English or French and notice the change in selected words.