Input Mask Dialog
The Input Mask dialog lets you create and modify the masks that are the values of the RadMaskedTextBox control's Mask and DisplayMask properties. You can display the Input Mask dialog in two ways:
From the RadMaskedTextBox Smart Tag, choose the SetMask link. When you bring up the Input Mask dialog in this way, the mask you create or choose is assigned to the Mask property, which controls the mask that is used when the user can edit the value.
Click the ellipsis button next to the Mask or DisplayMask property in the properties pane. The DisplayMask property is an optional override to the Mask property, for formatting the value of the masked text box when it does not have focus.
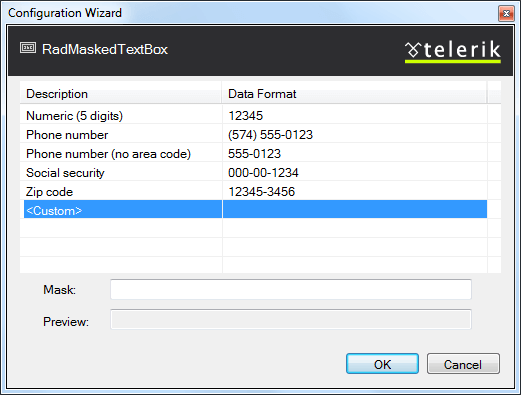
At the top of the dialog is a table of pre-defined masks that you can choose for common input tasks, along with sample values.
To choose a pre-defined mask, select its row in the table. The mask automatically appears in the Mask text box, with a preview to show the prompts and literals below it.
To specify a mask that is not pre-defined, choose
from the table of pre-defined masks. When you choose custom, the last mask that was selected in the table remains in the Mask text box for you to use as a starting point in entering a new mask. The preview updates as you edit the mask.
For complicated masks, you may choose to use the MaskPart Collection Editor instead.