How to: Create a New Database from a Model
This article is relevant to entity models that utilize the deprecated Visual Studio integration of Telerik Data Access. The current documentation of the Data Access framework is available here.
The Update Database from Model wizard allows you to generate schema definition script for creating a database from an existing domain model. The wizard allows you to do conceptual modeling first and then create a database that supports the domain model.
This topic describes how to create a new database from a domain model by using the Update Database from Model wizard.
- To start the wizard right-click on an empty area in the Visual Designer and select Update Database from Model.
-
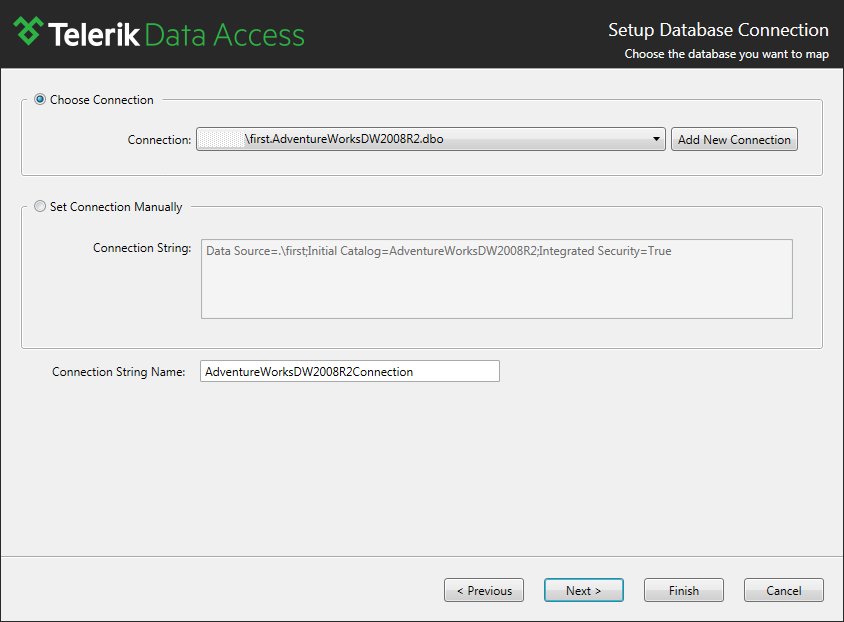
If there is no database connection specified for the domain model, the Setup Database Connection Dialog appears. Here you need to specify a connection to your database. If you have previously created connections they will show up in the list. The next image shows this step in the wizard.
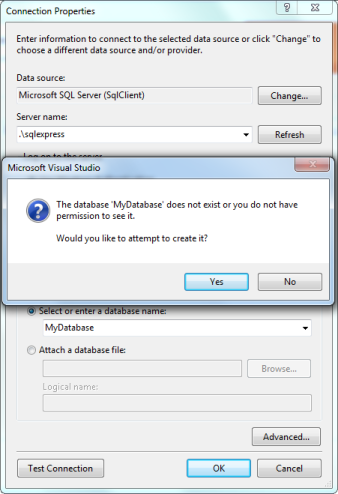
If you haven't created any connections you will need to create one, and this can be done by clicking the New Connection button. This will open the standard Connection Properties dialog. The Connection Properties dialog looks very similar to most of the other SQL Server connection dialogs in which you need to provide the server name, authentication method, and the database name. Select your server and type the database name in the database name field. Click OK to close the dialog. If your database does not exist on the server, then you will be prompted with a dialog asking you whether you want to create the database. Click Yes to create the database.
You will get taken back to the data connection page of the wizard with your new connection shown in the connection drop-down. You have to specify the name of the connection string or use the default one. This should be a unique name, which identifies the connection string in the <connectionStrings> </connectionStrings> section of the App.Config or Web.Config file (depending on the project type). Click Next to proceed.
-
On the next page you have to specify the update strategy. Since you are creating a database schema from a domain model, select the Create Database option. However, once your database schema is initialized, each time you want to update it again, you have to use the Migrate Database. The second case is discussed in the How to: Update an Existing Database Schema topic.
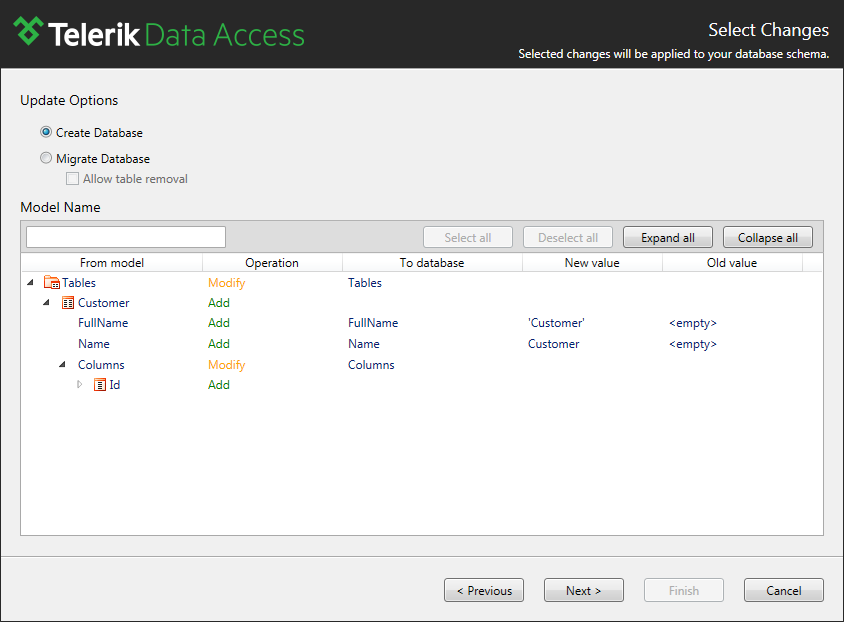
Click Next to continue.
-
On the Summary page, you could preview and execute the generated script. Select the Create script file and execute option and click Finish.

What Just Happened?
After clicking finish, Telerik Data Access will save a copy of the script, and execute it against the database.
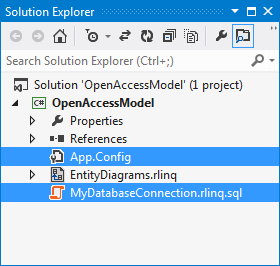
If you take a look at the Solution Explorer, you should see that two new files are added in your project - App/Web.config file and a file containing the generated script. The configuration file contains your connection string to the target database.
Next Steps
To learn how to migrate an existing database schema to the latest model state, check out How to: Update an Existing Database Schema. For a complete UI reference of the Update Database from Model wizard, read here.