Getting Started with OpenAccessLinqDataSource
Although you can bind query results directly to any data-bound control in a web application, updating persistent objects could be a challenging task due to the life cycle of the ASP.NET page. Fortunately, Telerik Data Access provides an easy way to use persistent classes in web applications when you are looking for a quick solution. The OpenAccessLinqDataSource simplifies data binding for CRUD operations. The configured control provides you with an easy way for data binding to any web control that supports this. For example, you can bind a RadGrid control, a RadListView control or DetailsView control to an OpenAccessLinqDataSource control. The data-bound control automatically creates the user interface to display the data from the OpenAccessLinqDataSource control.
The OpenAccessLinqDataSource control is available for Web Applications or Web Sites that use .NET version 4.
In this topic, you will create a sample ASP.NET Web Page that uses the OpenAccessLinqDataSource control. You will use a data-bound (e.g. RadGrid) control to display the data.
Creating a New ASP.NET Web Application
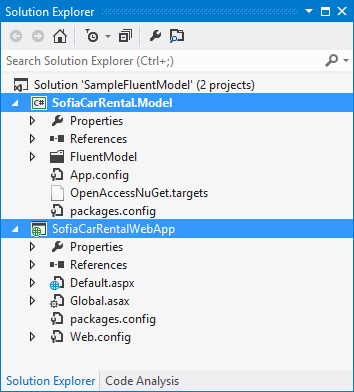
The first step is to create an empty ASP.NET Web Application and to add a class library with a fluent model based on SofiaCarRental in it.
To create such a solution and to configure it, you can use the workflow suggested in the Creating a New Web Application article.
Make sure that the solution is built.
Creating and Configuring an OpenAccessLinqDataSource Control
Now that you have created a new ASP.NET Web Application and a fluent model project, you can use an OpenAccessLinqDataSource control on an ASP.NET Web page to display and manage data.
To create and configure a new OpenAccessLinqDataSource control:
- Integrate the Telerik.DataAccess.Web NuGet package with the SofiaCarRentalWebApp project.
- Open your page in Source view.
-
Open the Default.aspx page in Source mode, and register the Telerik.OpenAccess.Web.40 assembly:
<%@ Register Assembly="Telerik.OpenAccess.Web.40" Namespace="Telerik.OpenAccess.Web" TagPrefix="telerik" %> -
Define a new instance of OpenAccessLinqDataSource, inside the first <div> tag of the page. The ID property should be OpenAccessLinqDataSourceCategory, the ContextTypeName should be the fully qualified name of the context class, i.e. SofiaCarRental.Model.FluentModel, and the ResourceSetName property should be set to a name of an endpoint of the context (the name of an IQueryable<T> property), i.e. Categories. The control should run on the server.
<telerik:OpenAccessLinqDataSource
    ID="OpenAccessLinqDataSourceCategory"
    runat="server"
    ContextTypeName="SofiaCarRental.Model.FluentModel"
    ResourceSetName="Categories">
</telerik:OpenAccessLinqDataSource>
Adding a Data-Bound Control to Display Data
You can now add a data-bound control and bind it to the OpenAccessLinqDataSource control. In this example a RadGrid control will be used.
To connect the data from the OpenAccessLinqDataSource control to a data-bound control:
- In Visual Studio, open the Default.aspx web page and switch to Design view.
- Drag a new RadScriptManager component from the Toolbox to the designer. RadScriptManager needs an HttpHandler to be declared in the application configuration file to operate properly. The addition of the handler is made easy by the SmartTags of the control. Right-click the RadScriptManager and select Show Smart Tag. Then select Register Telerik.Web.UI.WebResource.axd.
- Drag a new RadGrid control from the Toolbox and set the data source to OpenAccessLinqDataSourceCategory.
-
The following code-snippet shows the markup:
<telerik:RadScriptManager ID="RadScriptManager1" runat="server">
</telerik:RadScriptManager>

<telerik:OpenAccessLinqDataSource
    ID="OpenAccessLinqDataSourceCategory"
    runat="server"
    ContextTypeName="SofiaCarRental.Model.FluentModel"
    ResourceSetName="Categories">
</telerik:OpenAccessLinqDataSource>

<telerik:RadGrid ID="RadGrid1" runat="server"
    DataSourceID="OpenAccessLinqDataSourceCategory">
</telerik:RadGrid>
Testing the Application
You are now ready to test your project. Press F5 to run your application.

Enabling Insert, Update and Delete Operations
The OpenAccessLinqDataSource control can create commands for inserting, updating and deleting data.
To enable insert, update and delete operations, you need to set the EnableInsert, EnableUpdate, and EnableDelete properties of the datasource to True:
<telerik:OpenAccessLinqDataSource
    ID="OpenAccessLinqDataSourceCategory"
    runat="server" EnableInsert="true"
    EnableUpdate="True" EnableDelete="True"
    ContextTypeName="SofiaCarRental.Model.FluentModel"
    ResourceSetName="Categories">
</telerik:OpenAccessLinqDataSource>
To customize the RadGrid control to support insert, update and delete operations set the following grid properties through the Properties pane:
- Set AllowAutomaticUpdates to True.
- Set AllowAutomaticInserts to True.
- Set AllowAutomaticDeletes to True.
- Set AutoGenerateDeleteColumn to True.
- Set AutoGenerateEditColumn to True.
- Expand the MasterTableView section and set the CommandItemDisplay property to TopAndBottom.
Next, run your application and test the Insert, Update and Delete operations.
If you attempt to delete a category that has related data (cars), you will get a foreign key constraint error.
Next Steps
This topic has shown you the basic functionality of retrieving, updating, inserting, and deleting records by using the OpenAccessLinqDataSource control. Check out the following topics to learn about the additional capabilities of the OpenAccessLinqDataSource control: