Creating the Views
This article is relevant to entity models that utilize the deprecated Visual Studio integration of Telerik Data Access. The current documentation of the Data Access framework is available here.
In this topic, you will implement the third part of the MVC pattern, i.e. the Views. You will create the user interface for the demo application.
To Create the Views:
- Open the CategoryController class and scroll down to the Index method.
-
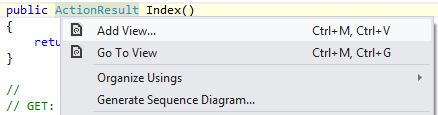
You need to add an Index view so that you can see what happens to the results of the Index method. Right-click the Index method declaration and select Add View.
-
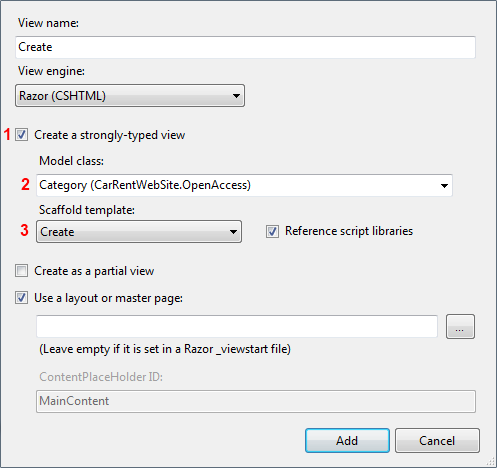
This will open the Add View dialog. Check the Create a strongly-typed view option. From the Model class drop-down, select the Category entity. From the Scaffold template drop-down, select List.

Click Add to create the Index view.
-
Perform the same steps for the Details, Create, Edit and Delete methods in the CategoryController class. The only specific moment is that you need to select the correct Scaffold template (or View content for MVC2). The next several snapshots show these steps:
-
Details View

-
Create View
-
Edit View

-
Delete View

-
Perform the same steps for the CarController class. The only difference is that you should select the Car entity from the Model class (or View data class for MVC2) drop-down.
-
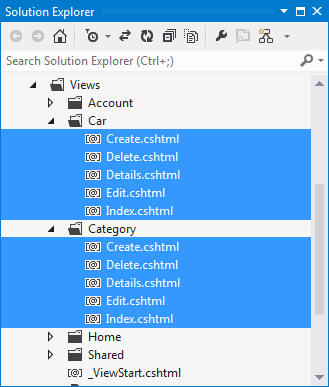
Visual Studio will create Category and Car folders under the Views folder and will add the views to these folders.
The demo application is almost completed. Open the _Layout.cshtml page (it is located in the ~Views/Shared folder). Find the id="menu" tag element and declare menu items for the Car and Category controllers.
<nav>
   <ul id="menu">
       <li>@Html.ActionLink("Home", "Index", "Home")</li>
       <li>@Html.ActionLink("About", "About", "Home")</li>
       <li>@Html.ActionLink("Contact", "Contact", "Home")</li>
       <li>@Html.ActionLink("Categories", "Index", "Category")</li>
       <li>@Html.ActionLink("Cars", "Index", "Car")</li>
   </ul>
</nav>
In this task, you implemented the third part of the MVC pattern, i.e. you created the views. The next step is to test your application.