How to: Create Associations
This article is relevant to entity models that utilize the deprecated Visual Studio integration of Telerik Data Access. The current documentation of the Data Access framework is available here.
An association type (also called an association) is the fundamental building block for describing relationships in the Telerik Data Access Domain Model. Associations define relationships between persistent classes in the domain model. Associations are represented on the design surface as a line that connects two persistent types.
This topic will show you how to create new associations between your persistent classes in database-first and model-first scenario.
Creating an association does the following:
- Creates a visual representation of the association and adds it to the design surface.
- Adds navigation properties to the visual representations of the types at each end of the association.
- Modifies the part of the .rlinq file that defines the conceptual part of the domain model.
Database First Scenario
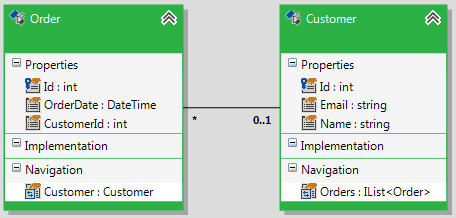
In this section you will see how to create new associations when your model is generated from an existing database. For the purpose of this demo the following domain model will be used:
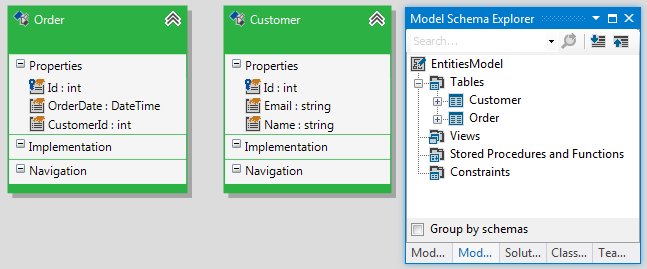
The domain model contains two classes - Order and Customer. Both of them are mapped to database tables - respectively, Orders and Customers. As you can see there aren't any relations between the Order and Customer entities.
To create a new one-to-many association between the Order and Customer entities:
- Open the Toolbox Items and select the Association item.
-
Select the objects to be included in the association by clicking the child entity in the design surface and then clicking the parent entity on the design surface. You may consider the child entity as the entity that will hold the foreign key. For example, if you want the Order entity to contain the foreign key, then you have to click it first and then click on the Customer entity. Doing this will open the Association Editor dialog.
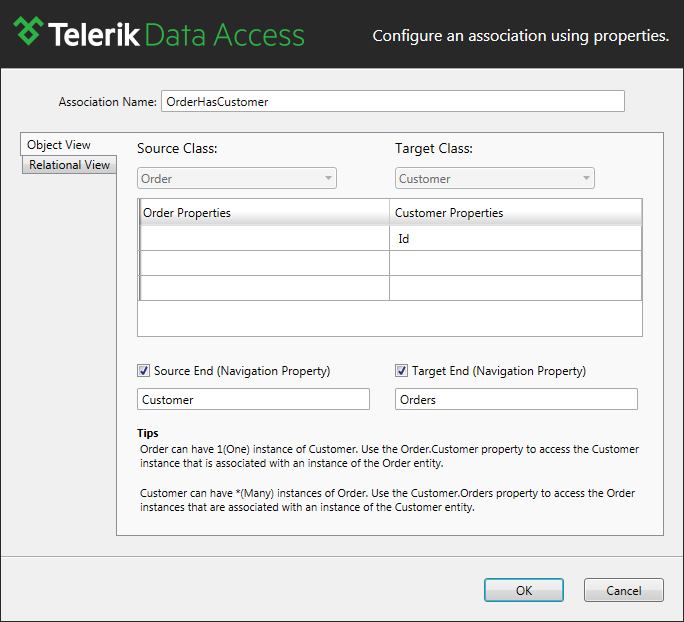
The first step here is to specify the foreign key property for the child (source) entity. Note that Telerik Data Access automatically resolves the primary key property of the entity at the other side of the navigation (i.e. the Target class or the Parent class). However, Telerik Data Access cannot resolve the foreign key property in the Source class. That's why you have to specify it manually.
-
When you click on the Order Properties grid a new drop-down with all properties of the Source Class will appear.
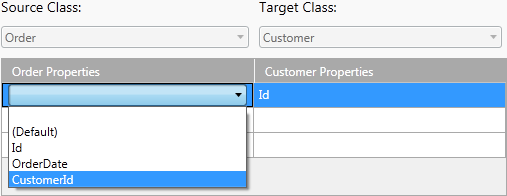
Here you should select the foreign key property. Note that there is one special option - (Default). When you use the (Default) option for a foreign key, then Telerik Data Access will automatically create a foreign key column during the update of the database schema. If you use the (Default) option for the primary key (the target property), then Telerik Data Access will try to map to the default identity of the target class. More information about the (Default) option could be found in the Working with Associations section.
- In this demo the CustomerId property will be foreign key, so select it from the drop-down.
- The next step is to specify names for the navigation properties. Also you may control whether a navigation property for the target class will be generated or not.
-
When all selections are done, click OK to create the association and close the dialog.
Model First Scenario
In this section you will see how to create new associations when you are doing model-first mapping. For the purpose of this demo the following domain model will be used:
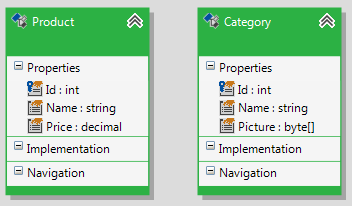
The process of creating relationships between your entities in Model First Scenario is absolutely the same:
- Open the Toolbox Items and select the Association item.
-
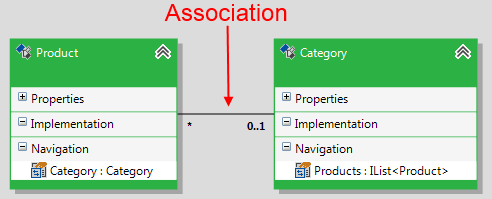
Select the objects to be included in the association by clicking the child entity in the design surface and then clicking the parent entity on the design surface. For example, if you want the Product entity to contain the foreign key, then you have to click it first and then click on the Category entity. Doing this will open the Association Editor dialog.
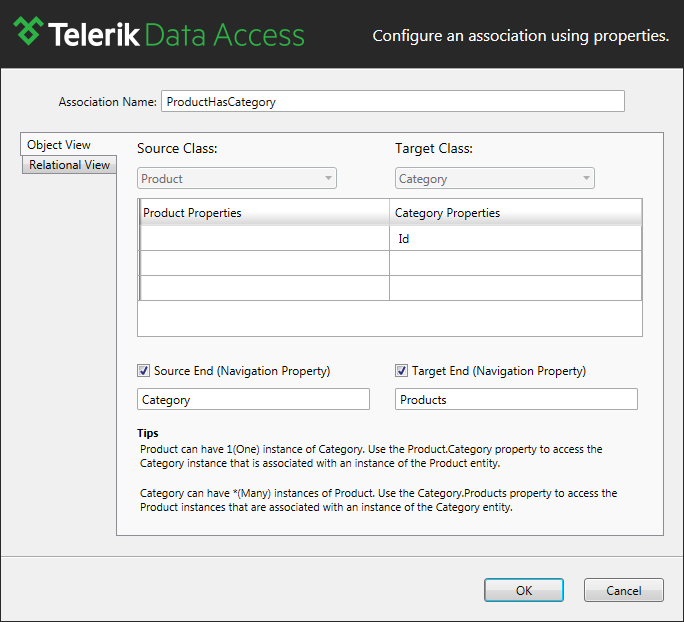
The first step here is to specify the foreign key property for the child (source) entity. Note that Telerik Data Access automatically resolves the primary key property of the entity at the other side of the navigation (i.e. the Target class or the Parent class). However Telerik Data Access cannot resolve the foreign key property in the Source class. That's why you have to specify it manually.
-
When you click on the Product Properties grid a new drop-down with all properties of the Source Class will appear.
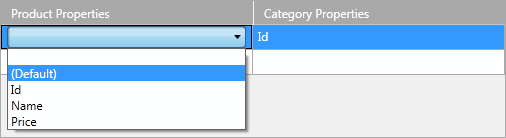
Select the (Default) option. Here you should select the foreign key property. Note that there is one special option - (Default). When you use the (Default) option for a foreign key, then Telerik Data Access will automatically create a foreign key column during the update of the database schema. If you use the (Default) option for the primary key (the target property), then Telerik Data Access will try to map to the default identity of the target class.
- Again, you could change the names for the navigation properties.
- When you click OK, a new association between the Product and Category classes will be created in the Visual Designer.
Next Steps
This topic demonstrates the most basic scenarios for creating associations. For more scenarios and detailed explanations, check out the following topics: